
Hey folks, how are you today? We will be talking about the Franzininho C0 (Google translate required) an education embedded systems development board developed by Fabio Souza from Embarcados portal. It features an ARM Cortex M0+ from ST (STM32C011F6P6).
The idea behind Franzininho is to empower the Brazilian market students and hobbyists to make their own projects; I paid the equivalent to US$15 on such hardware. Their official website features a variety of other boards, including some with Wi-Fi.
My goal when acquiring the Franzininho C0 was to learn more about the ARM Cortex-M0+ family of microcontrollers. Such family of uC’s has the goal of eclipsing/shadowing the 8bit and 16bit ones, via its low energy consumption and low cost.
The specs of Franzininho C0 are:
- Run at 48Mhz
- Has a built in LED and push button
- 32kB flash memory (same as Arduino UNO – not for comparison)
- 13 analog inputs
- RTC
- Eight timers/counters
- 16 GPIO
- Breadboard friendly
- Programmable via JTAG/SWD
How can you program it?
I have not found a getting started guide for Franzininho C0, so I had to use my own knowledge for it. Their website says it can be programmed via STM32Cube IDE (download here). There is example code in the project Github.
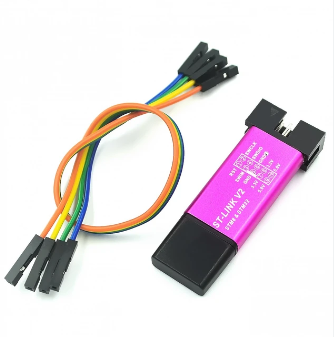
How to flash your code into it? I had at home a simple STlink V2 I bought some years for some Chinese website. This article says you can program a STM32F103 (blue pill) with it so I imagine you can program a C0 with it too.
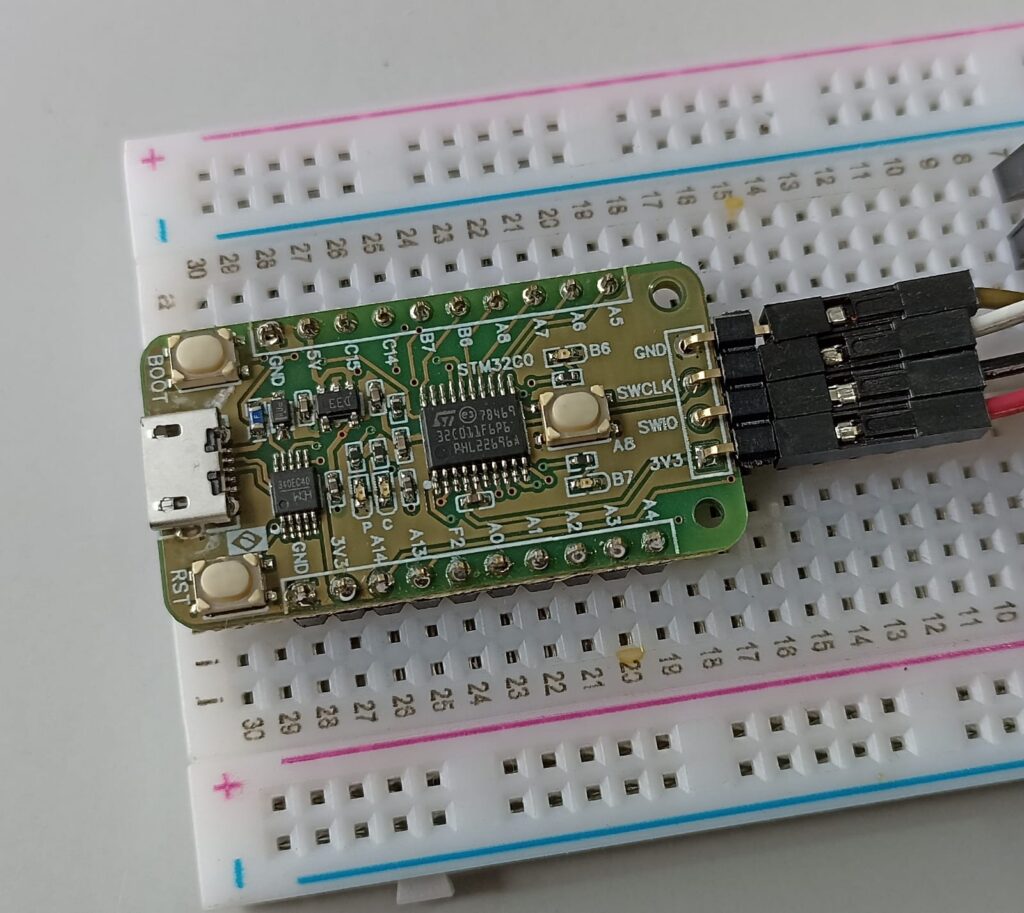
The connection between the Franzininho C0 and STlink-V2 is:
Programmer — Franzininho C0
3V3 — 3V3
GND — GND
SWDIO — SWIO
SWCLK – SWCLK
Download some example code of your choice from the above mentioned Github and unzip it in a known place of your computer. When opening the STM32Cube IDE, go to “File > New > STM32 Project from an existing STM32CubeMX configuration file (.ioc)” and select “.ioc” file from where you saved the Github files earlier, this way all project files will be imported into the environment.
I started from the “02-exemplo-blinky-int” example , which blinks the onboard Franzininho C0’s LED.
Being the good engineer I am, I went right after to change the blinking period. I figured that had nothing to change on main.c, instead found the linke below at tim.c:
htim17.Init.Period = (500 - 1);this is where you define the tim17 period (in millisseconds) – an it worked right away (examplos will follow below).
In order to program the STM23C0 from the STM32Cube IDE you have to configure it, this way:
In “Project” menu go to “Properties; on your left click “Run/Debug settings”; click “New” and select “STM32 C/C++ application”. On”Debugger” select “Autostart local GDB server”, and on dropdown select “ST-LINK (ST-LINK GDB SERVER)”.
In “Interface” select “SWD”; “frequency (kHz)” leave “Auto”, in “Access port” select “0- Cortex – M0Plus”. Click “Apply” and then “OK”.
Now to compile and burn the uC go to “Project > Build All” and check for errors in the window below the screen. My successfull return was:
15:11:53 Build Finished. 0 errors, 0 warnings. (took 4s.710ms)Now with Franzininho C0 connected to STlink-V2 and your computer via USB, on the above screen menu click “Run > Run”. After a couple of seconds the below console will show a similar message to the below one, indicating success.
-------------------------------------------------------------------
                       STM32CubeProgrammer v2.15.0
      -------------------------------------------------------------------


Log output file:   C:\Users\Clovisf\AppData\Local\Temp\STM32CubeProgrammer_a03280.log
ST-LINK SN  : 57FF71064880565370360987
ST-LINK FW  : V2J43S7
Board       : --
Voltage     : 3.22V
SWD freq    : 4000 KHz
Connect mode: Under Reset
Reset mode  : Hardware reset
Device ID   : 0x443
Revision ID : Rev A
Device name : STM32C01x
Flash size  : 32 KBytes (default)
Device type : MCU
Device CPU  : Cortex-M0+
BL Version  : 0x51


Memory Programming ...
Opening and parsing file: ST-LINK_GDB_server_a03280.srec
  File          : ST-LINK_GDB_server_a03280.srec
  Size          : 5.71 KB
  Address       : 0x08000000


Erasing memory corresponding to segment 0:
Erasing internal memory sectors [0 2]
Download in Progress:


File download complete
Time elapsed during download operation: 00:00:00.296


Verifying ...


Download verified successfully


Shutting down...
Exit.
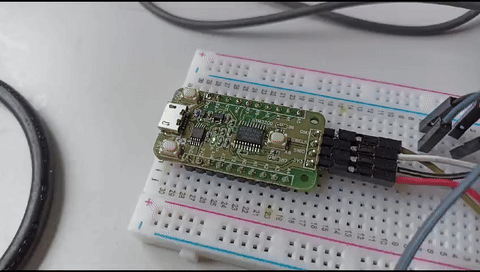
Now you can look at the Franzinho C0 and see it blinking its LED!.

Different from the 8bit world, the 32bit ones have a lot more “overhead” and files to configure and thinker; just look at the amount of files this project has. What I advice you is to take some time and explore all thigs that came with this example, change this and see what happens.
On Project’s GitHub there is a total of 15 examples, from blink to ADC and PWM and encoder, matrix keyboard, explore!.
I congratulate Fabio Souza for the development of this tool (and embarcados portal for marketing it). Also I invite you to explore my blog looking for more content in the search box above the content.
Pingback: ESP32-S2 based Franzininho Wi-Fi dev board - FritzenLab electronics
Pingback: STM32C0 Franzininho with Arduino IDE - tips and tricks - FritzenLab electronics
Pingback: STM32 Blue pill Arduino IDE - FritzenLab electronics