
Follow this tutorial to learn how to implement a study timer with ESP32. That is paired with a 1.8″ TFT LCD display, a buzzer and a AHT21 temperature sensor. Full code is in the GitHub repository.
The objetive of this product (that you will DIY) is to create a timer of 15, 30, 45 or 60 minutes. So that you can focus (study, work) for that time then take some pauses. It features a push button, a buzzer and a 1.8 inches TFT LCD display.
You can push the button between one and four times within four seconds. After that delay, the selected time will start counting down. For example if you press the button three times, 45 minutes will start counting down at the buzz of the buzzer.
There are other features to this product as well: an API fetches date and time from TimeZoneDB website. Also an AHT21 sensor serves local temperature and humidity. Time left is shown on screen in two ways: with number at the top center and in a bargraph in the bottom.
That time left has an interesting and unique feature: it always shows “time selected minus 1 minute”. I explain: when you select time, say 45 minutes, it will immediately show 44 minutes on screen. Same for the last minute, it will show “00” instead of “01”. That is because when the timer starts say 45 minutes, after a second it will already be 44 minutes and 59 seconds. So I always show “time selected minus 1 minute” on screen.
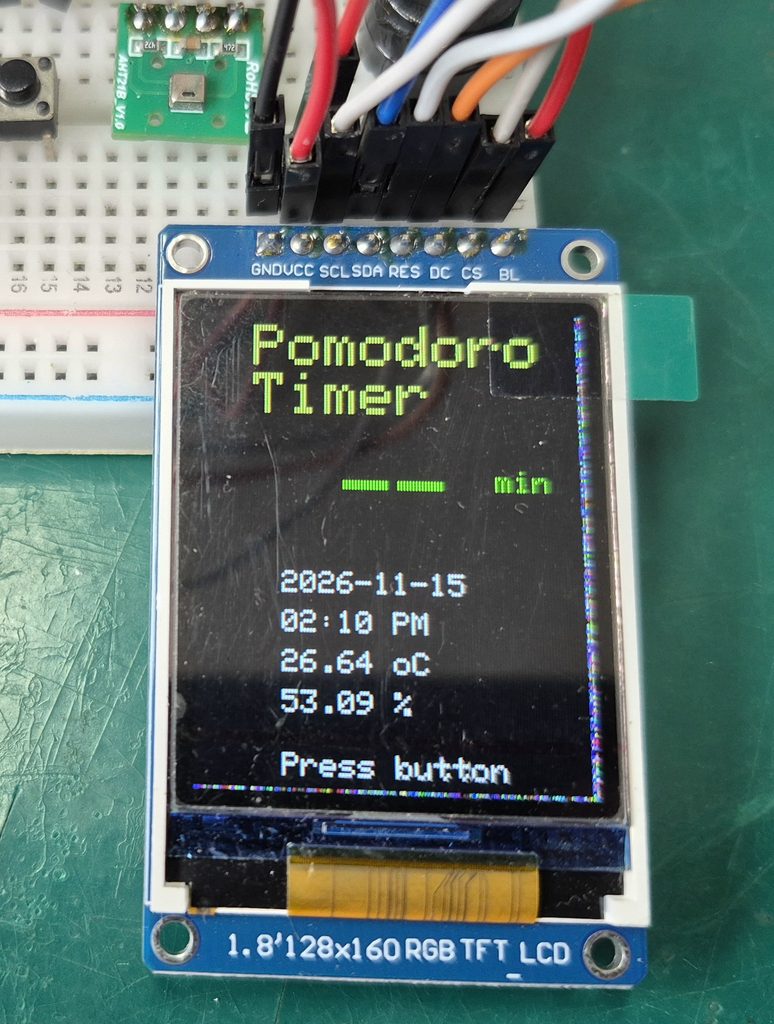
You can see in the image above, when there is no time being counted, two dashes “–” are shown. There is also a text at the bottom, saying “Press button”. Also have a look at the time and date from the TimeZoneDB API, along with temperature and humidity from the AHT21 sensor.
Hardware/wiring
Our study timer with ESP32 features the ESP32-C6 Super mini from Aliexpress. It is a nice variant of the ESP32 family, since it also supports Matter and Thread, besides Wi-Fi and Bluetooth. The actual LCD display I am using is a 1.8″ TFT, which I bought from here and works (communicates) via SPI port. We actually have talked about this display before.
I am using an AHT21 temperature and humidity sensor for good measure. Also have talked about it (briefly) here on this blog post. Besides that, I am using a 6×6 push button for timing start/stop and a 5V buzzer for indicating start/stop of time counting.
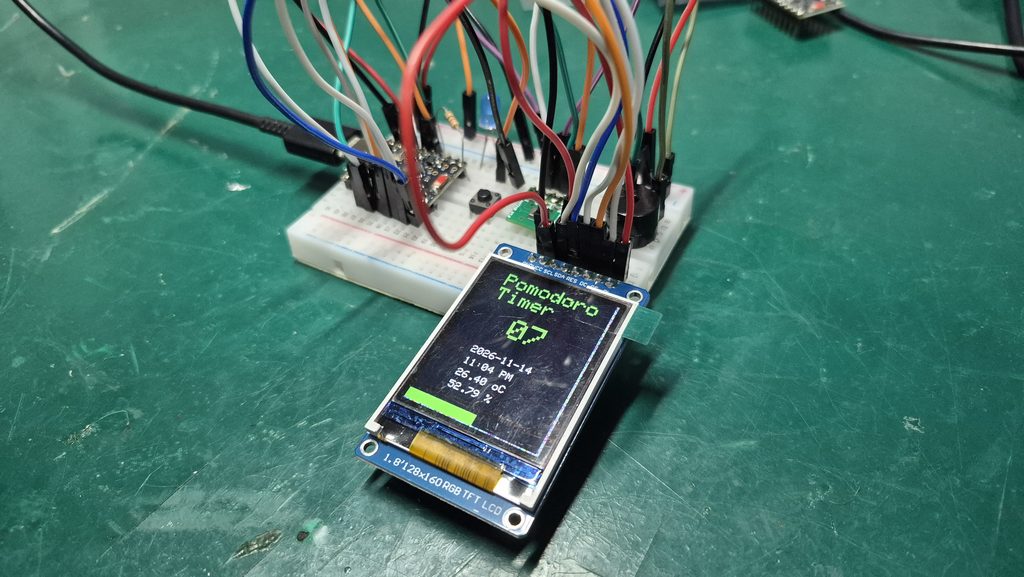
I have assembled everything on a single 400 point breadboard, since the ESP32-C6 Super Mini really is super mini. Schematic diagram is below, along with a picture of the assembly. The whole thing is power up by the same USB cable that is used to flash firmware to the ESP32.
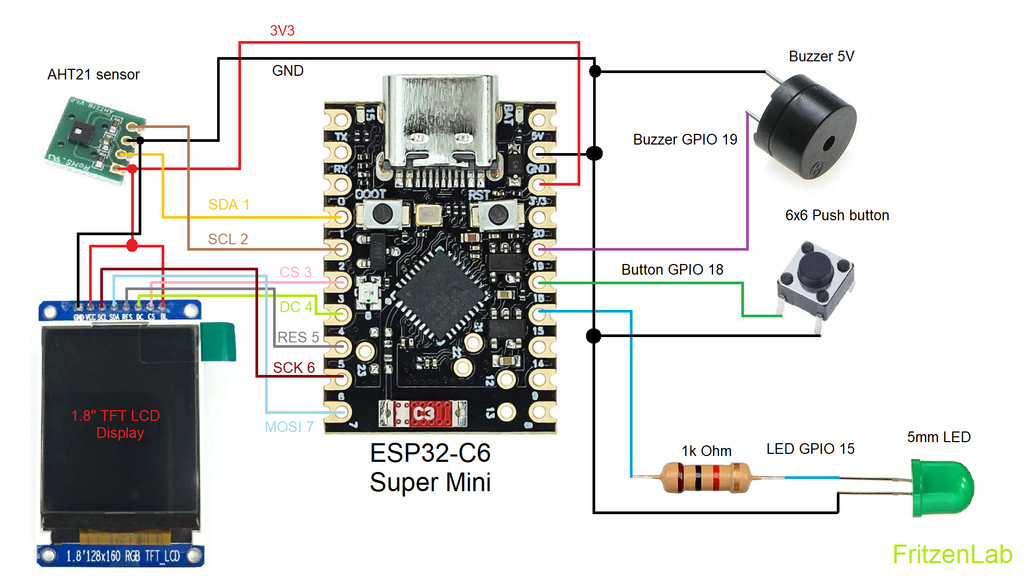
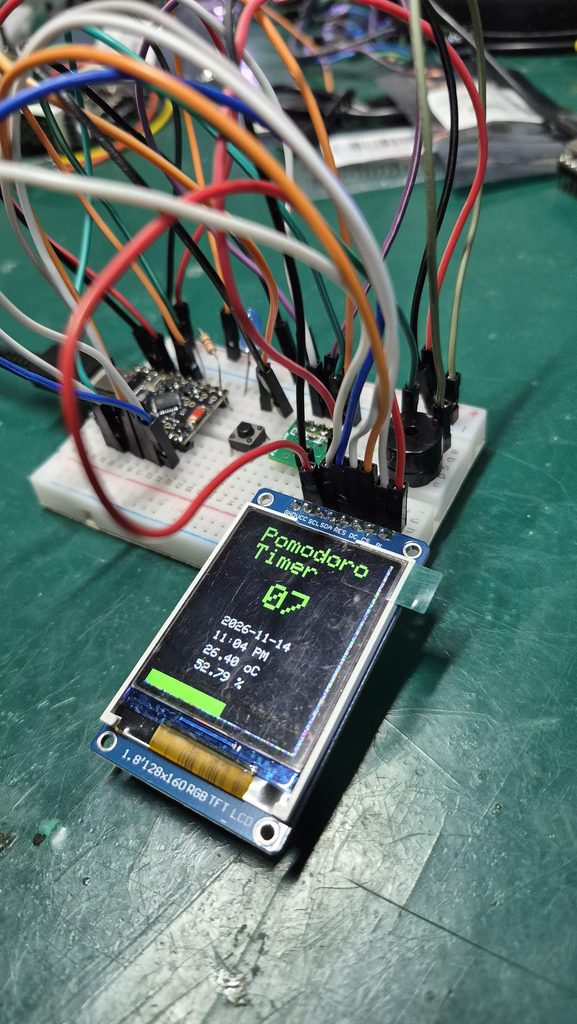
You can note we are using a whole bunch of pins from the ESP32-C6 Super mini. That is since the TFT LCD display uses SPI (so four pins), the AHT21 sensor uses i2c (so two pins). Then the buzzer, LED and push button use one pin each.
Firmware/code
For the most part, this Arduino code is from another pomodoro timer I made a while ago (with an e-paper display). All logic comes from there: push button, timing, webserver, everything. All I did now was to remove the e-paper code and add the TFT LCD one.
Talking about webserver, this timer has a nice little hidden feature. When you power it up in a place that is not your usual Wi-Fi, it will fail to connect to the internet. So it will not fetch date/time. To solve that, press the push button five times, 5 short presses. A network called “Pomodoro TFT” will show, connect to it with your cell phone. Then enter the 192.168.4.1 web address (in your cellphone web browser) and connect to your local Wi-Fi network. Done!.
As stated before, you can select from one of four desired pomodoro times: 15, 30, 45 or 60 minutes. To do that you have to press the push button (short presses) one to four times. After around two seconds the buzzer will buzz for a while and the selected time (minus one minute) will show on screen.
While the time is counting down, every minute the screen will be updated with the current minute. A progress bar is shown shrinking on the bottom of the screen. Independent of all of that there will be date, time, temperature and humidity on screen, at all times.
If you want to cancel the current timer/countdown, just press and hold the push button for longer than five seconds. Full code is in this Github repository. I am not pasting the full code here, it is a little too big for that.
Notice that you need a second file called “secrets.h”, containing you Wi-Fi credentials, your TimeZoneDB credentials and your network name. An example of such file is below. Add it to the same folder your Arduino code is sitting.
#pragma once

// WiFi (hardcoded fallback — AP mode saves credentials via Preferences)
#define WIFI_SSID         "wifi name"
#define WIFI_PASSWORD     "password"

// TimezoneDB
#define TIMEZONEDB_API_KEY "timezonedb api key"
#define MY_CITY	"location"

// Access Point network name
#define AP_NETWORK_NAME   "network name"
Study timer with ESP32 – testing it out
Copy the full code from the GitHub repository linked above, then open your Arduino IDE. I am using the version 2.3.11, but you could virtually use any version above 1.8.x. Of course I recommend that you stay up to date with that. You will need to install some libraries for this code to compile. For that, go to “Sketch > Include Library > Manage Libraries”. Then search for these:
- Adafruit ST7735. It will ask you to install other libraries alongside it; allow.
- Arduino JSON.
- HTTPclient.
- Adafruit AHTX0.
Then you can connect you ESP32-C6 to the computer USB port, also click the “->” upload button on the top left of the Arduino IDE. That compilation will take a while, around 3+ minutes in my experience and with my computer. After that time, your board will be already running the full pomodoro timer code, enjoy!.
Some pieces of advice for you, if you decide to build this project:
- Any ESP32 (not ESP8266) will work, you just need to adjust the pin matching (numbers) on top of the sketch.
- The AHT21 reading is separated from the rest of the code, inside the “updateSensors()” function. That makes it easier for you to swap sensors, as needed.
- The same goes for the display, everything related to it is inside the “drawUI()” function.
- That same modularity also applies to the buzzer and LED, just remove the function calls and you are already eliminating it from your code, as needed.
I made a video illustrating how this pomodoro timer works, it sits on top of the article (after the first paragraph). Enjoy it and as always: comment in the form below or you my Youtube channel. See you guys in the next article.