This is the project page for the Mini USB WiFi thermometer with ESP32. The idea is to create a thermometer whose data is sent to the cloud, to a service like Adafruit.io or ThingSpeak. There will not be a display or anything, just a single LED which is onboard of the choosen controller, a Xiao ESP32-C6.
Looking for the fabricantion files? Made in Kicad, here.
What I want with this project is a way of having real world temperature (and maybe humidity) data sent to the cloud for me to use. This of course demands two things: a chip capable of doing WiFi (which the Xiao ESP32-C6 is) and a home WiFi router, which I have at home.
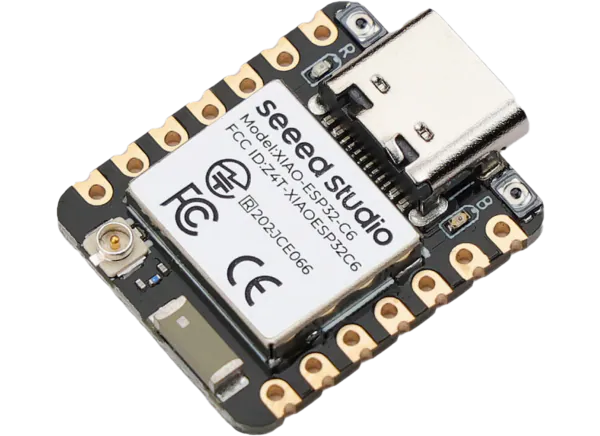
Form-factor
My original idea is to have a product small enough (and low power enough) that it can be connected to a USB charger. I don’t want the USB connecting to be functional, just the power pins to power the circuit. Programming the ESP32-C6 is done via its own onboard USB-C connector.
You can see the schematic, PCB and 3D view below. The sensor is to be a HTU21D, a temperature and humidity i2c sensor. Github schematics and PCB here.
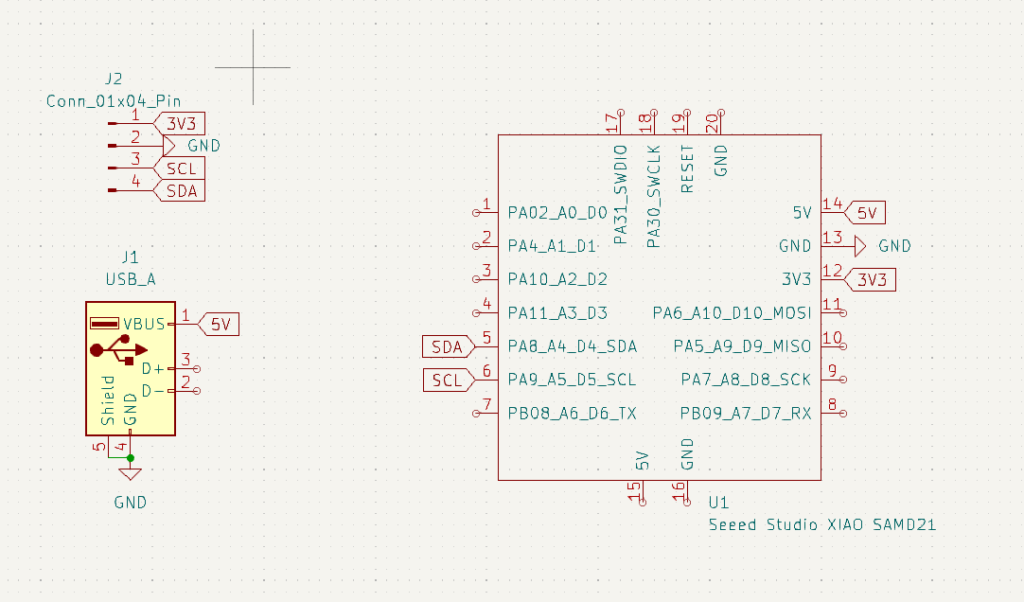
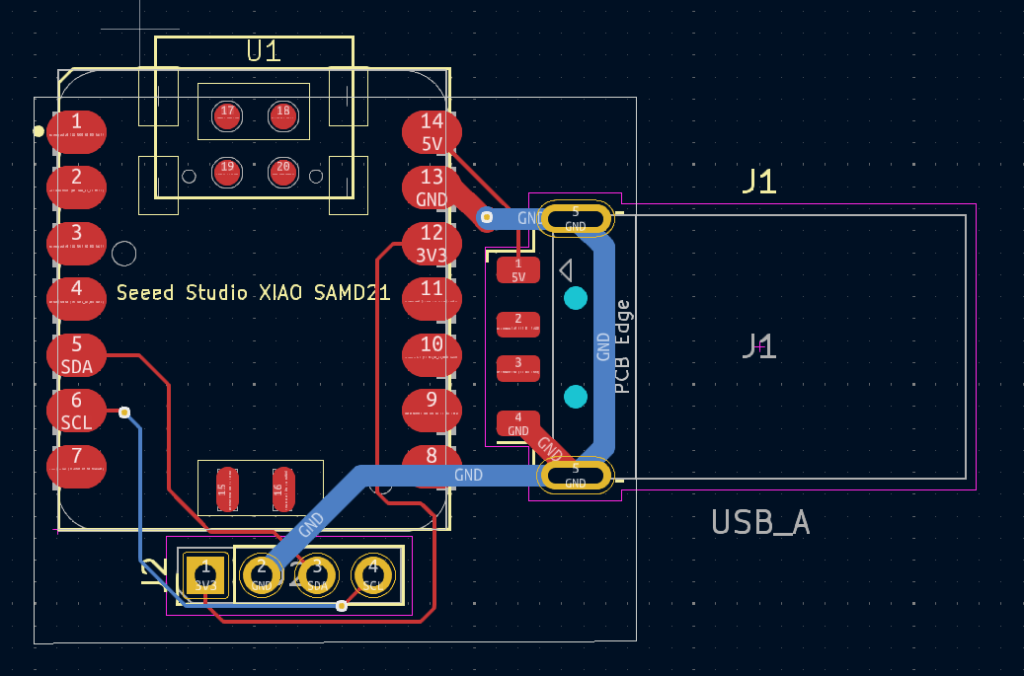
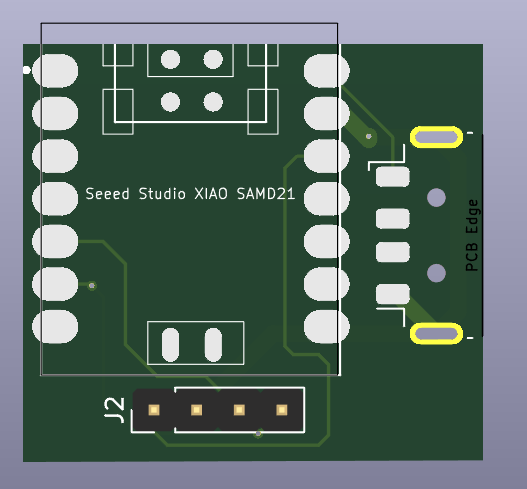
Components
USB-A connector will be the male SMD version, just because this is easy to source locally for me (in Brazil). Controller IC will be the SeeedStudio Xiao ESP32-C6, which is a WiFi one. This could also be the -C3 version from the same manufacturer.
The sensor choice was an easy one, there are a bunch of option of ICs whose communication is over i2c and work with 3.3V. I could choose between (for example) BMP280, AHT10, SHT21, LM75 or HTU21D.
I end up going with the HTU21D because (again) it is easy to source locally here in Brazil. Of course I could just buy any of the options from Aliexpress.
Software/firmware
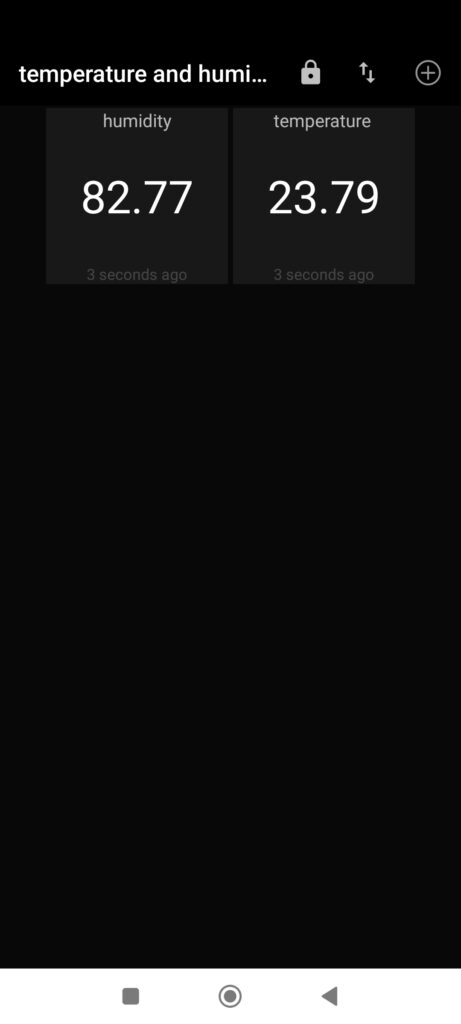
Software is done and ready to use. I first implemented the readings of the HTU21D via i2c, here. It works like a charm, no worries; I also have started testing the MQTT protocol with ESP32, which can be seen here. Have been able to connect to the Adafruit MQTT server and sent HTU21D data to it. Was even able to relay data to a phone app called MQTT Dash, to observe temperatures and humidities on my cellphone.
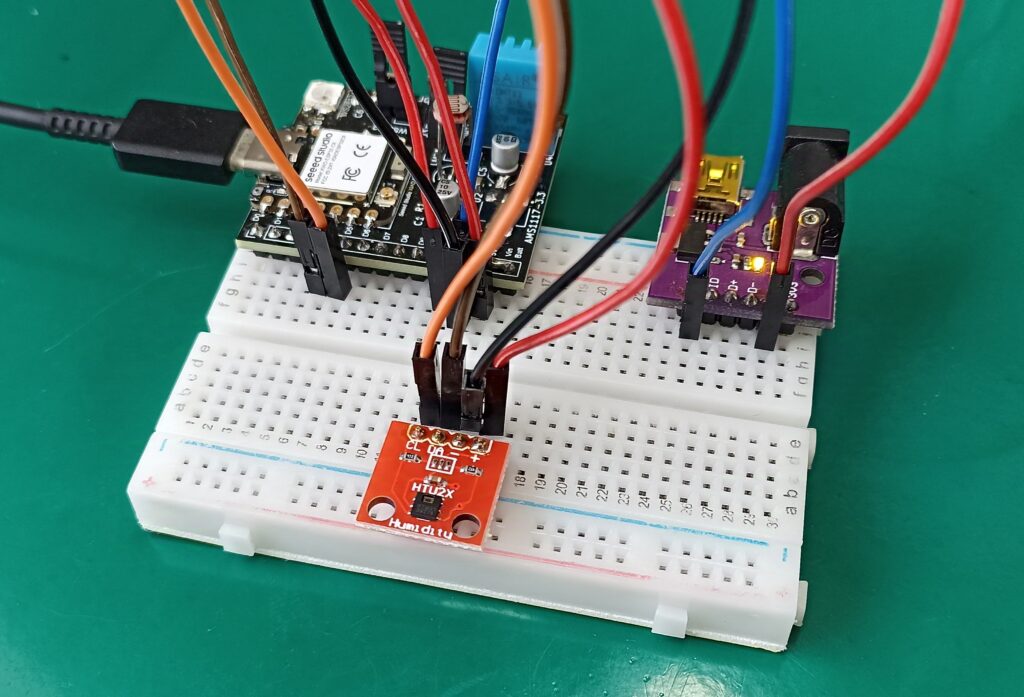
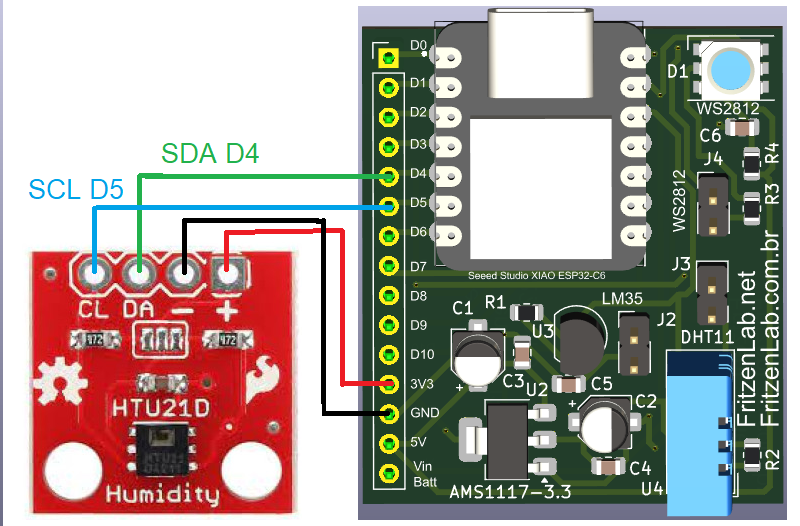
I am thiking that I will surely follow this path with this project:
- HTU21D temperature and humidity sensor
- SeeedStudio Xiao ESP32-C6 controller
- MQTT from Adafruit (maybe other vendor, don’t know)
- MQTT Dash app (maybe also relay data to a custom made web page, Github pages…)
Arduino code is as follow. Notice that you have to put your own WiFi credentials and Adafruit AIO_KEY. Adafruit MQTT and HTU21D libraries are necessary, search for them and install in the Arduino IDE itself.
#include <WiFi.h>
#include "WiFiClientSecure.h"
#include "Adafruit_MQTT.h"
#include "Adafruit_MQTT_Client.h"

/************************* WiFi Access Point *********************************/

#define WLAN_SSID ""
#define WLAN_PASS ""

/************************* Adafruit.io Setup *********************************/

#define AIO_SERVER      "io.adafruit.com"

// Using port 8883 for MQTTS
#define AIO_SERVERPORT  8883

// Adafruit IO Account Configuration
// (to obtain these values, visit https://io.adafruit.com and click on Active Key)
#define AIO_USERNAME "clovisf"
#define AIO_KEY      ""

/************ Global State (you don't need to change this!) ******************/

#include <Wire.h>
#include "Adafruit_HTU21DF.h"

Adafruit_HTU21DF htu = Adafruit_HTU21DF();

// WiFiFlientSecure for SSL/TLS support
WiFiClientSecure client;

// Setup the MQTT client class by passing in the WiFi client and MQTT server and login details.
Adafruit_MQTT_Client mqtt(&client, AIO_SERVER, AIO_SERVERPORT, AIO_USERNAME, AIO_KEY);

// io.adafruit.com root CA
const char* adafruitio_root_ca = \
      "-----BEGIN CERTIFICATE-----\n"
      "MIIEjTCCA3WgAwIBAgIQDQd4KhM/xvmlcpbhMf/ReTANBgkqhkiG9w0BAQsFADBh\n"
      "MQswCQYDVQQGEwJVUzEVMBMGA1UEChMMRGlnaUNlcnQgSW5jMRkwFwYDVQQLExB3\n"
      "d3cuZGlnaWNlcnQuY29tMSAwHgYDVQQDExdEaWdpQ2VydCBHbG9iYWwgUm9vdCBH\n"
      "MjAeFw0xNzExMDIxMjIzMzdaFw0yNzExMDIxMjIzMzdaMGAxCzAJBgNVBAYTAlVT\n"
      "MRUwEwYDVQQKEwxEaWdpQ2VydCBJbmMxGTAXBgNVBAsTEHd3dy5kaWdpY2VydC5j\n"
      "b20xHzAdBgNVBAMTFkdlb1RydXN0IFRMUyBSU0EgQ0EgRzEwggEiMA0GCSqGSIb3\n"
      "DQEBAQUAA4IBDwAwggEKAoIBAQC+F+jsvikKy/65LWEx/TMkCDIuWegh1Ngwvm4Q\n"
      "yISgP7oU5d79eoySG3vOhC3w/3jEMuipoH1fBtp7m0tTpsYbAhch4XA7rfuD6whU\n"
      "gajeErLVxoiWMPkC/DnUvbgi74BJmdBiuGHQSd7LwsuXpTEGG9fYXcbTVN5SATYq\n"
      "DfbexbYxTMwVJWoVb6lrBEgM3gBBqiiAiy800xu1Nq07JdCIQkBsNpFtZbIZhsDS\n"
      "fzlGWP4wEmBQ3O67c+ZXkFr2DcrXBEtHam80Gp2SNhou2U5U7UesDL/xgLK6/0d7\n"
      "6TnEVMSUVJkZ8VeZr+IUIlvoLrtjLbqugb0T3OYXW+CQU0kBAgMBAAGjggFAMIIB\n"
      "PDAdBgNVHQ4EFgQUlE/UXYvkpOKmgP792PkA76O+AlcwHwYDVR0jBBgwFoAUTiJU\n"
      "IBiV5uNu5g/6+rkS7QYXjzkwDgYDVR0PAQH/BAQDAgGGMB0GA1UdJQQWMBQGCCsG\n"
      "AQUFBwMBBggrBgEFBQcDAjASBgNVHRMBAf8ECDAGAQH/AgEAMDQGCCsGAQUFBwEB\n"
      "BCgwJjAkBggrBgEFBQcwAYYYaHR0cDovL29jc3AuZGlnaWNlcnQuY29tMEIGA1Ud\n"
      "HwQ7MDkwN6A1oDOGMWh0dHA6Ly9jcmwzLmRpZ2ljZXJ0LmNvbS9EaWdpQ2VydEds\n"
      "b2JhbFJvb3RHMi5jcmwwPQYDVR0gBDYwNDAyBgRVHSAAMCowKAYIKwYBBQUHAgEW\n"
      "HGh0dHBzOi8vd3d3LmRpZ2ljZXJ0LmNvbS9DUFMwDQYJKoZIhvcNAQELBQADggEB\n"
      "AIIcBDqC6cWpyGUSXAjjAcYwsK4iiGF7KweG97i1RJz1kwZhRoo6orU1JtBYnjzB\n"
      "c4+/sXmnHJk3mlPyL1xuIAt9sMeC7+vreRIF5wFBC0MCN5sbHwhNN1JzKbifNeP5\n"
      "ozpZdQFmkCo+neBiKR6HqIA+LMTMCMMuv2khGGuPHmtDze4GmEGZtYLyF8EQpa5Y\n"
      "jPuV6k2Cr/N3XxFpT3hRpt/3usU/Zb9wfKPtWpoznZ4/44c1p9rzFcZYrWkj3A+7\n"
      "TNBJE0GmP2fhXhP1D/XVfIW/h0yCJGEiV9Glm/uGOa3DXHlmbAcxSyCRraG+ZBkA\n"
      "7h4SeM6Y8l/7MBRpPCz6l8Y=\n"
      "-----END CERTIFICATE-----\n";

/****************************** Feeds ***************************************/

long oldtime;
long oldtimeled;

// Setup a feed called 'test' for publishing.
// Notice MQTT paths for AIO follow the form: <username>/feeds/<feedname>
Adafruit_MQTT_Publish temperaturereadings = Adafruit_MQTT_Publish(&mqtt, AIO_USERNAME "/feeds/temperaturereadings");
Adafruit_MQTT_Publish humidityreadings = Adafruit_MQTT_Publish(&mqtt, AIO_USERNAME "/feeds/humidityreadings");
/*************************** Sketch Code ************************************/

void setup() {
  Serial.begin(115200);
  pinMode(15, OUTPUT);
  delay(10);

  Serial.println(F("Adafruit IO MQTTS (SSL/TLS) Example"));

  // Connect to WiFi access point.
  Serial.println(); Serial.println();
  Serial.print("Connecting to ");
  Serial.println(WLAN_SSID);

  delay(1000);

  WiFi.begin(WLAN_SSID, WLAN_PASS);
  delay(2000);

  while (WiFi.status() != WL_CONNECTED) {
    delay(500);
    Serial.print(".");
  }
  Serial.println();

  Serial.println("WiFi connected");
  Serial.println("IP address: "); Serial.println(WiFi.localIP());

  // Set Adafruit IO's root CA
  client.setCACert(adafruitio_root_ca);

  if (!htu.begin()) {
    Serial.println("Check circuit. HTU21D not found!");
    while (1);
  }

}

uint32_t x=0;

void loop() {

  if(millis() - oldtimeled > 200){
    oldtimeled= millis();
    digitalWrite(15, !digitalRead(15));
  }
  if(millis() - oldtime >= 60000){
    oldtime= millis();

    // Ensure the connection to the MQTT server is alive (this will make the first
    // connection and automatically reconnect when disconnected).  See the MQTT_connect
    // function definition further below.
    MQTT_connect();

    float temp = htu.readTemperature();
    float hum = htu.readHumidity();
    // Now we can publish stuff!
    Serial.print(F("\nSending val "));
    Serial.print(temp);
    Serial.print(F(" to test feed..."));
    if (! temperaturereadings.publish(temp)) {
      Serial.println(F("Failed"));
    } else {
      Serial.println(F("OK!"));
    }
    if (! humidityreadings.publish(hum)) {
      Serial.println(F("Failed"));
    } else {
      Serial.println(F("OK!"));
    }
  }


}

// Function to connect and reconnect as necessary to the MQTT server.
// Should be called in the loop function and it will take care if connecting.
void MQTT_connect() {
  int8_t ret;

  // Stop if already connected.
  if (mqtt.connected()) {
    return;
  }

  Serial.print("Connecting to MQTT... ");

  uint8_t retries = 3;
  while ((ret = mqtt.connect()) != 0) { // connect will return 0 for connected
       Serial.println(mqtt.connectErrorString(ret));
       Serial.println("Retrying MQTT connection in 5 seconds...");
       mqtt.disconnect();
       delay(5000);  // wait 5 seconds
       retries--;
       if (retries == 0) {
         // basically die and wait for WDT to reset me
         while (1);
       }
  }

  Serial.println("MQTT Connected!");
}
Prototype
I have (as of 09/03/2024) sent the PCB files for manufacturing, they arrived on 09/26/2024 (it generally takes any time between 30 and 60 days to arrive for me in Brazil, this time was faster). You can see the assembly in the pictures below.
There is really only three components besides the PCB: USB connector, ESP32-C6 and HTU21D sensor. Took me two minutes to assemble and flash the firmware.
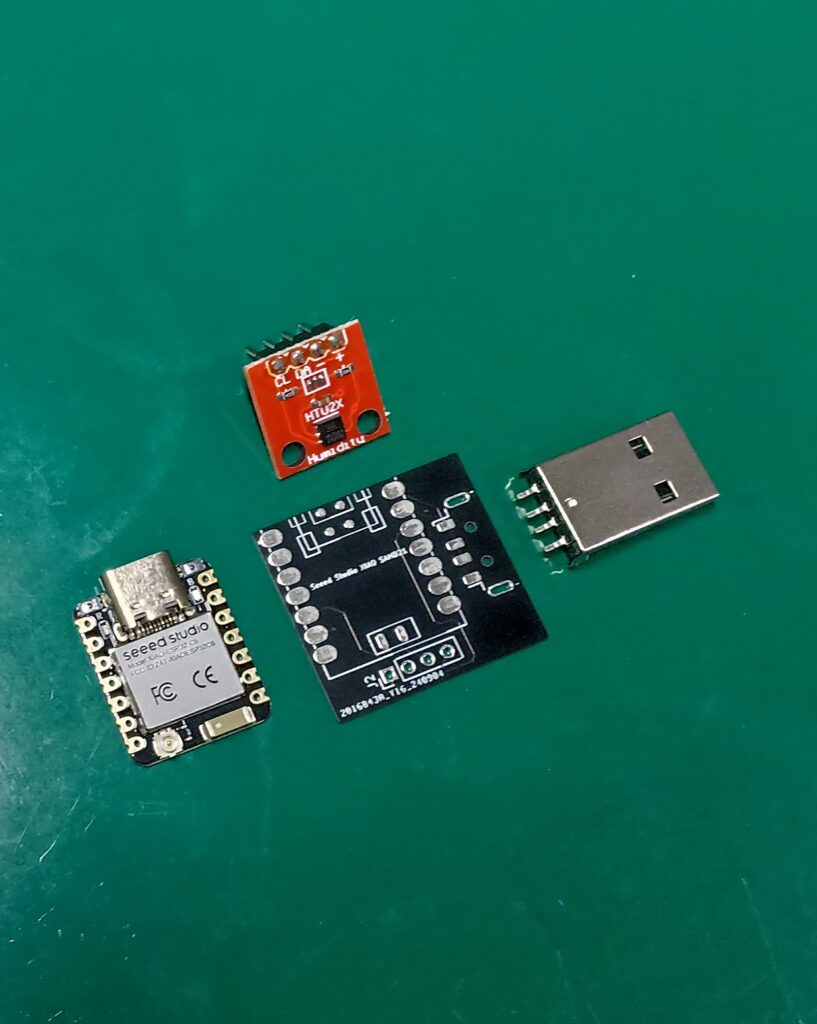
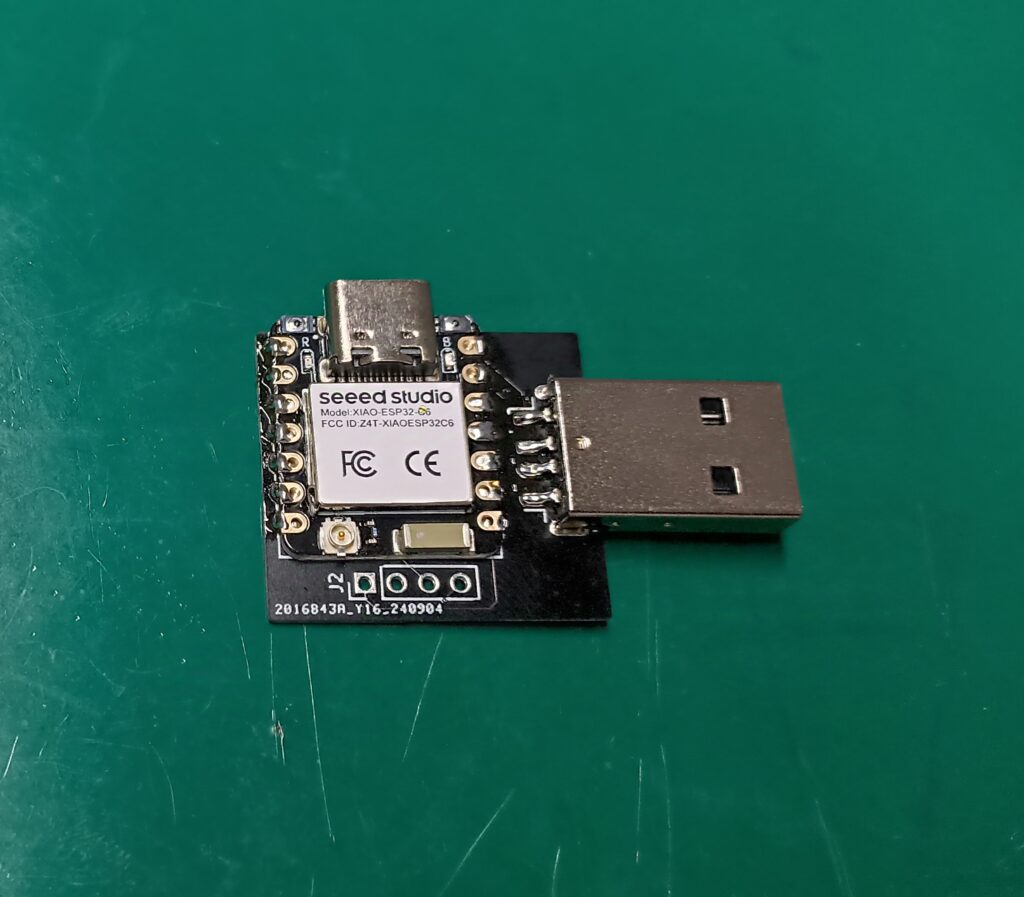
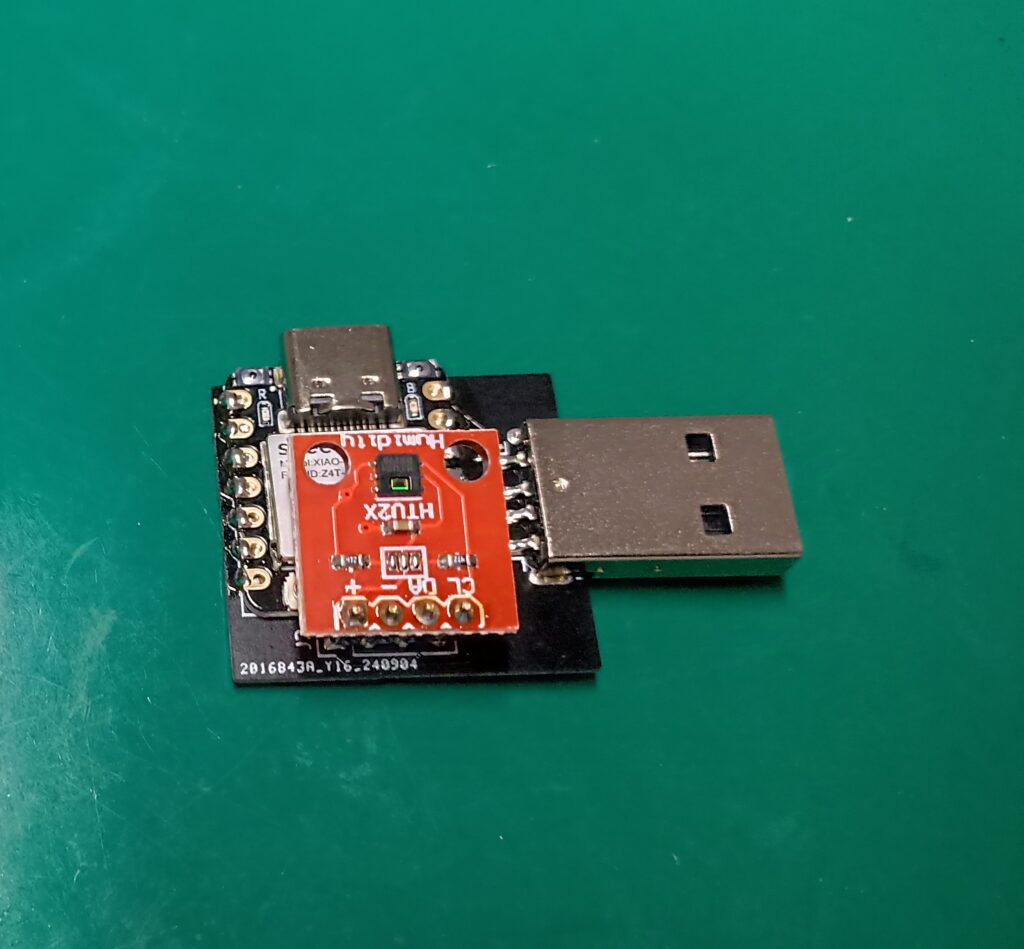
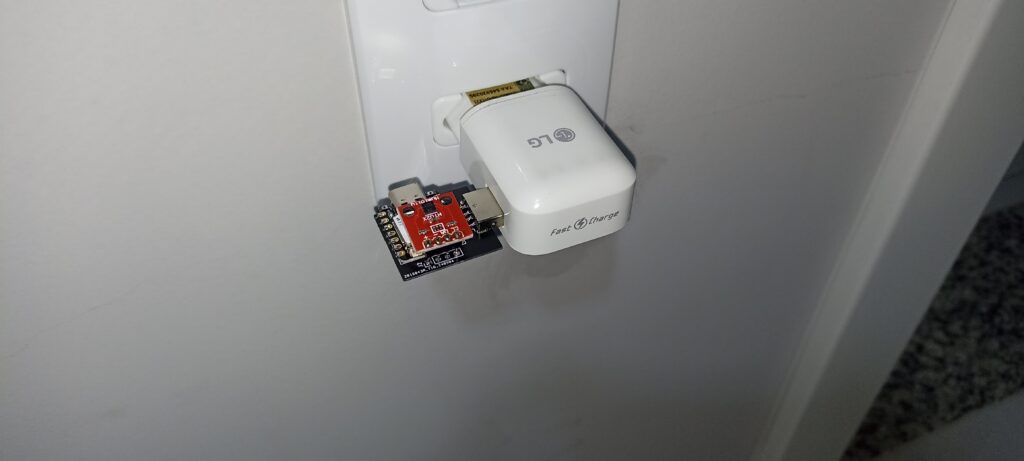
As you can see below, the circuit mounts directly to a 5V cellphone power brick. It then connects to WiFi and sends data to Adafruit MQTT server via WiFi.
Results
As stated before, I am sending temperature and humidity data to Adafruit servers via WiFi and MQTT. I do that every 60 seconds (look at the code above), so that I can use the free tier of Adafruit’s services. I then connected an APP called MQTT Dash to the same server and am looking at live data from my sensor.
There is a LED blinking every 200mS for good measure, just so I know the system still has power. This is the onboard LED of the Xiao ESP32-C6 on pin 15. Since there is no other clue the system is supplied and running, it is a good thing to have a LED blink.

As you can see above, temperature and humidity data from the HTU21D get to the MQTT Dash Android app. This happens every 60 seconds and repeats indefinitely. I have made a single test so far, the system sent data to Adafruit for 24 hours without a fail.