
Do you want to learn how to implement an Youtube subscribers counter with ESP32 and Arduino code? this is the right article for you. We will use no special libraries, no special fetch or get/post anything. Number of subscribers will be shown on a 128×64 pixels OLED display.
I have to admit that ChatGPT helped me on this one. I have actually been looking for such code for a long time. No article that I ever tried helped me get this counter right. Most examples on Google are outdated, meaning they used to work but not anymore. Or outright wrong or incomplete, making it inviable to implement such counter. So ChatGPT came to my rescue.
My final idea for a subscriber counter is to create a small display for my bench, to be shown on my videos. That is a visual representation of how many people actually follow me, on both Youtube channels I own. I also plan to include here (in the future) my Tiktok and Instagram fanbase. But that revolves around other means of actually fetching the numbers.
Which is different from what I am doing here in this article, since Google only asks for you to provide two things. In order to fetch subscribers you have to access an URL and provide your unique ApiKey and channelID. That is all, besides obviously not spamming the thing with requests. It means not exceeding 10,000 request a day. In the code I will provide you, we will make two requests in sequence.
Details
This is since I own two Youtube channels, so you can consider two requests per time. Besides that I also have decided to limit the number of requestes at one (actually two) per hour, so I only fetch such numbers every sixty minutes. For a small Youtube channel like mine, that is more than enough. Number do not go up (or down) that quickly.
For this tutorial you are going to need two things: one ESP32 like this one, which in my case is the ESP32-C3 Super mini as seen here and here. Also one (any one, really) small i2c OLED display, like the one seen here. Other materials can be included by yourself, using your creativity, like for example sensors or LEDs/Buzzers.
You could also go one step further and add NTP code for fetching current time. That would allow you to show the time in the display alongside the subscribers counter.
Hardware
For the actual code we will implement, all you need is one of many types of ESP32, even ESP8266 would go. Also one small OLED display, in my case a 128×64 pixels one from DFRobot. All you have to do is connect four wires between ESP32 and the OLED display. Those are 3V3, GND, SDA and SCL. Power supply for powering the OLED display comes directly from th ESP32.
Schematic diagram and picture of the assembly are below.
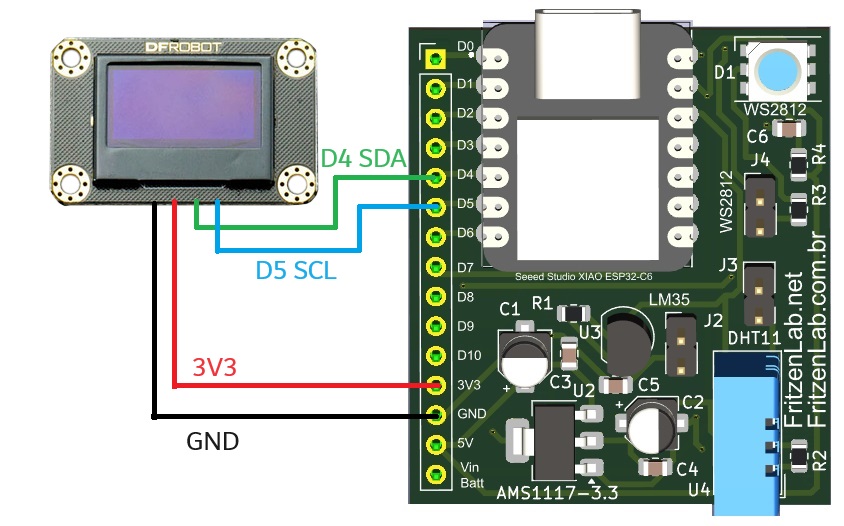
One important thing to notice is the position of the i2C pins, since they are not where they “should be”. In this link they are shown in pins GPIO 6 and 7, but it did not work for me. I then searched the internet and found them on pins GPIO 8 and 9, specially on this link. So pins GPIO 8 (SDA) and 9 (SCL) are the correct ones for i2c.
Another detail is the supply voltage for the OLED display. I was having it not working with 3V3, so I switched it to 5V and now it works. If you face similar issues, where the display does not power on, just connect its VCC to 5V. My specific display from DFRobot has circuitry to convert 5V to 3V3 internally, this is why it works with said voltage.
Firmware
This is the full code you are going to use to display subscriber counters for two Youtube channels. If you do not use two channels, please remove the parts indicated in the code.
#include <WiFi.h>
#include <HTTPClient.h>
#include <ArduinoJson.h>
#include <SPI.h>
#include <Wire.h>
#include <Adafruit_GFX.h>
#include <Adafruit_SSD1306.h>

#define SCREEN_WIDTH 128
#define SCREEN_HEIGHT 64
#define OLED_RESET    -1
Adafruit_SSD1306 display(SCREEN_WIDTH, SCREEN_HEIGHT, &Wire, OLED_RESET);

#define LOGO16_GLCD_HEIGHT 64
#define LOGO16_GLCD_WIDTH  128

const char* ssid     = "";
const char* password = "";

const char* apiKey   = "";
const char* channelIdNet = ""; // channel ID for the first channel
const char* channelIdBR = ""; // channel ID for the second channel
long fetchTime= 0;
int fritzenlabNet= 0; // counter variable for the first channel
int fritzenlabBR= 0; // counter variable for the second channel

void setup() {
  Serial.begin(115200);

  Wire.begin();

  WiFi.begin(ssid, password);

  display.begin(SSD1306_SWITCHCAPVCC, 0x3C);  // initialize with the I2C addr 0x3C (for the 128x64)
  display.display();

  Serial.print("Connecting WiFi");
  while (WiFi.status() != WL_CONNECTED) {
    delay(500);
    Serial.print(".");
  }
  Serial.println("\nWiFi connected");

  getSubscribersNet();
  getSubscribersBR();
  display.clearDisplay();
  display.setTextSize(1);
  display.setTextColor(WHITE);
  display.setCursor(0,0);
  display.println("FritzenLab Net:");
  display.setCursor(0,16);
  display.println(fritzenlabNet);
  display.setCursor(0,30);
  display.println("FritzenLab BR:");
  display.setCursor(0,46);
  display.println(fritzenlabBR);
  display.display();
}

void loop() {
  // update every 60 seconds
  if(millis() - fetchTime > 3600000){
    fetchTime= millis();
    getSubscribersNet();
    getSubscribersBR();

    display.clearDisplay();
    display.setTextSize(1);
    display.setTextColor(WHITE);
    display.setCursor(0,0);
    display.println("FritzenLab Net:");
    display.setCursor(0,16);
    display.println(fritzenlabNet);
    display.setCursor(0,30);
    display.println("FritzenLab BR:");
    display.setCursor(0,46);
    display.println(fritzenlabBR);
    display.display();

  }

}
// This function is for a single youtube channel
void getSubscribersNet() {
  if (WiFi.status() != WL_CONNECTED) return;

  HTTPClient http;

  String url =
    "https://www.googleapis.com/youtube/v3/channels"
    "?part=statistics"
    "&id=" + String(channelIdNet) +
    "&key=" + String(apiKey);

  http.begin(url);
  int httpCode = http.GET();

  if (httpCode == 200) {
    String payload = http.getString();

    StaticJsonDocument<1024> doc;
    deserializeJson(doc, payload);

    long subscribers =
      doc["items"][0]["statistics"]["subscriberCount"];

    if(subscribers != 0){
      fritzenlabNet= subscribers;
      Serial.print("FritzenLab Net: ");
      Serial.println(subscribers);
    }

  } else {
    Serial.print("HTTP Error: ");
    Serial.println(httpCode);
  }

  http.end();
}
// This function is for the second youtube channel
void getSubscribersBR() {
  if (WiFi.status() != WL_CONNECTED) return;

  HTTPClient http;

  String url =
    "https://www.googleapis.com/youtube/v3/channels"
    "?part=statistics"
    "&id=" + String(channelIdBR) +
    "&key=" + String(apiKey);

  http.begin(url);
  int httpCode = http.GET();

  if (httpCode == 200) {
    String payload = http.getString();

    StaticJsonDocument<1024> doc;
    deserializeJson(doc, payload);

    long subscribers =
      doc["items"][0]["statistics"]["subscriberCount"];

    if(subscribers != 0){
      fritzenlabBR= subscribers;
      Serial.print("FritzenLab BR: ");
      Serial.println(subscribers);
    }

  } else {
    Serial.print("HTTP Error: ");
    Serial.println(httpCode);
  }

  http.end();
}
A couple of things have to be taken into account in the code above. First one is WiFi “ssid” and “password”, which are your own. Then Google’s “ApiKey” and “ChannelID”. Your channel ID can be found via this page: channel ID. Now you ApiKey has to be generated via this page. Those are both alphanumeric strings that have to be paste into the Arduino code above.
These are then paste into a complete URL which will return subscribers number. It uses the structure seen below:
String url =
    "https://www.googleapis.com/youtube/v3/channels"
    "?part=statistics"
    "&id=" + String(channelIdNet) +
    "&key=" + String(apiKey);
I execute said code once during the setup() of Arduino then every 3600000 milisecons, or 60 minutes. As stated above, since my channel is small enough I do not need a faster update rate for such variable.
Also as stated above, if you are not going to show subscribers for two channels, please remove or comment the duplicated code. It is signaled with comments in the code above.
Testing and results
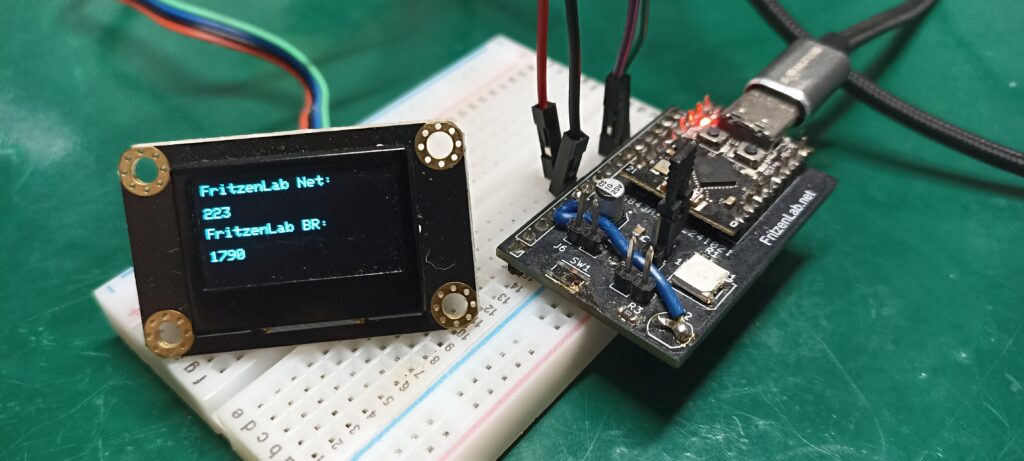
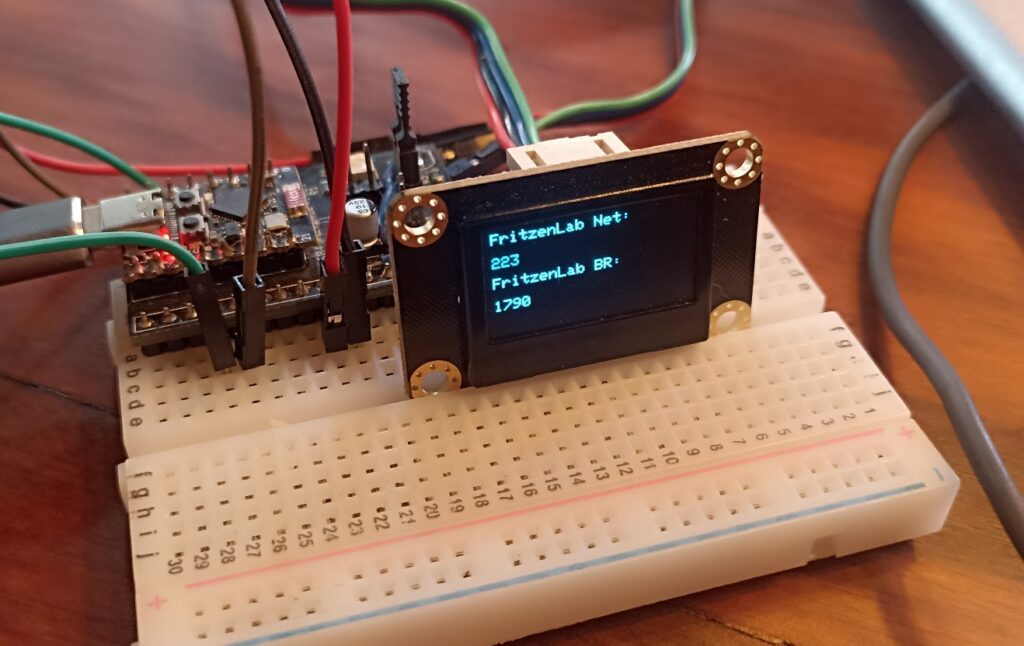
Upon compiling the code and flashing it to my ESP32-C3 Super mini, I immediately get a WiFi connecting tentative. After a couple of seconds the WiFi conects and the text below shows up on the OLED display:
FritzenLab net:
223
FritzenLab BR:
1790
That means success, it means the code is really fetching subscriber numbers from both my Youtube channels. At the time of this writing the FritzenLab_net channels had 223 subscribers. The FritzenLab_br one had 1790 subscribers. I made a quick video illustrating the system working:
Pingback: Amazing gadget with ESP32 - FritzenLab electronics