Learn how to send ESP32 sensors to Telegram, using Arduino code to create a weather station. Data will be sent as frequently as you want to your Telegram APP, via WiFi. In the past I have implemented a similar weather station, sending data to my Whatsapp.

The issue with that is that the Whatsapp bridge service, CallMeBot, has a limit in the total number of messages it can send. After that it will make you buy their service. So instead of buying a service, I decided to implement a similar weather station to Telegram. This is (as far as I know) free to use. I also do not know of any limits in number of messages sent, so a win-win.
How does it work?
There are a handful of layers to this project. First of all, it will read ENS160 + BME280 sensors, then use MQTT to send data (over WiFi) to Adafruit.io services. All of that is done using a Xiao ESP32-C6, which is one of the WiFi capable models of ESP32. ENS160 is an environmental sensor, packing multi-gas sensors, even having an internal heating element. It is capable of sensing (for example) Ethanol and Hydrogen.
BMP280 is also an environmental sensor, this one comprising atmospheric pressure, temperature and humidity. Both sensors communicate to the ESP32-C6 via i2c, each one having its own address. So there is no collision while trading information or anything like that. Another layer to this project is the capability of sending data (messages) to your private Telegram APP.
This is done by using an Arduino library called Universal Telegram Bot, which handles all the “behind the scenes”. This means capturing your ESP32 sensor data and making it travel all the way to the Telegram APP. I used this tutorial as my starting point, but went way far beyond of it.
Where do I begin?
For this project you will need a couple of previously-acquired knowledge, as stated in the above chapter. For instance (click the links to go to the tutorials):
- ENS160 sensor
- BME280 sensor
- Adafruit MQTT
- NTP time (you could use NTP as I did, or even use an API, what is important is to read time in hours and minutes)
This project is a construction, since I first started with Adafruit + MQTT then went to ENS160 + BME280. Then did a Whatsapp version and finally this weather station sending data to Telegram. Code will look and feel a bit big and bloated, but this is the best I could achieve.
I have had this project run for multiple months in my place, without interruptions (it is WiFi failure-safe). It is installed in my balcony, capturing real outdoors environmental data. It will send such data to my cellphone every 6 hours: 12AM, 6AM, 12PM and 6PM. This is how it looks in my cellphone screen.
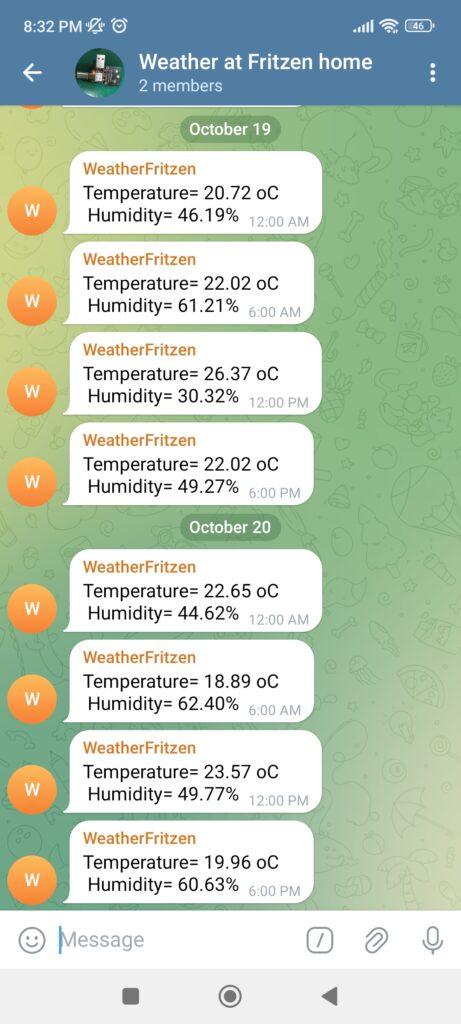
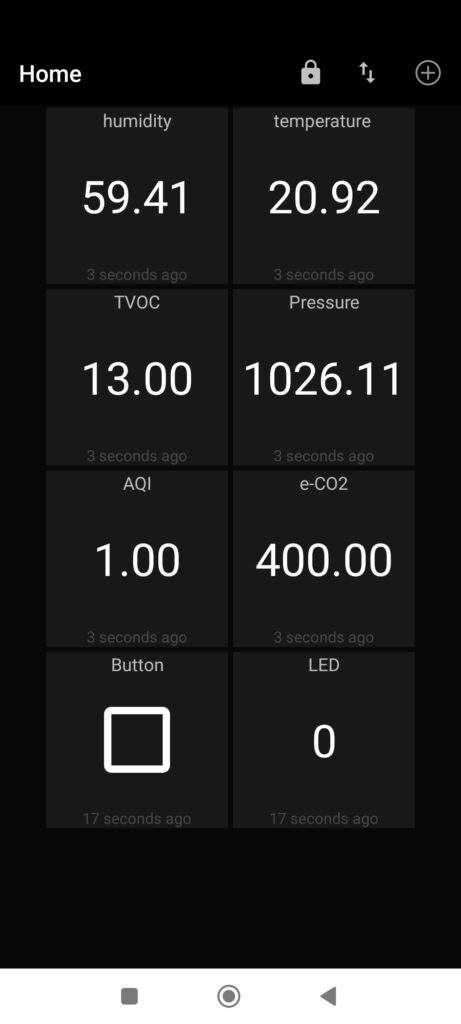
As you can see above, the “WeatherFritzen” user sends data into a group, “Weather at Fritzen home”. I am the only person on the group besides the bot. I also configured an APP called MQTT Dash to read MQTT data from Adafruit.io, as seen below. I get fresh data only every one minute, so that I do not spam Adafruit’s services.
Hardware
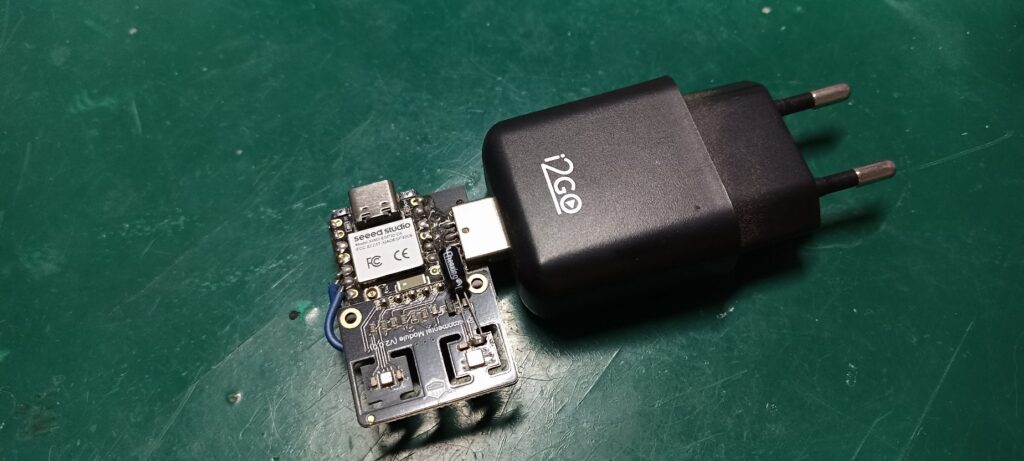
For this project you will need an ENS160 and a BME280 in a breakout board, one ESP32-C6 (but it could be any other ESP32, really). I am using a cellphone charger (5V power supply) as the main energy source. I made a printed circuit board to house the entire project, see it here.
Schematic diagram is seen below. As stated before, everything is supplied by a single USB connection (5V). Current consumption is in the order of dozens of miliamps, specially and mostly when using WiFi.

Sensors connection is done via i2c, so two wires only (apart from 3V3 and GND). I ended up soldering the DFRobot’s sensors board directly over my USB ESP32-C6 PCB, as seen in the image below.
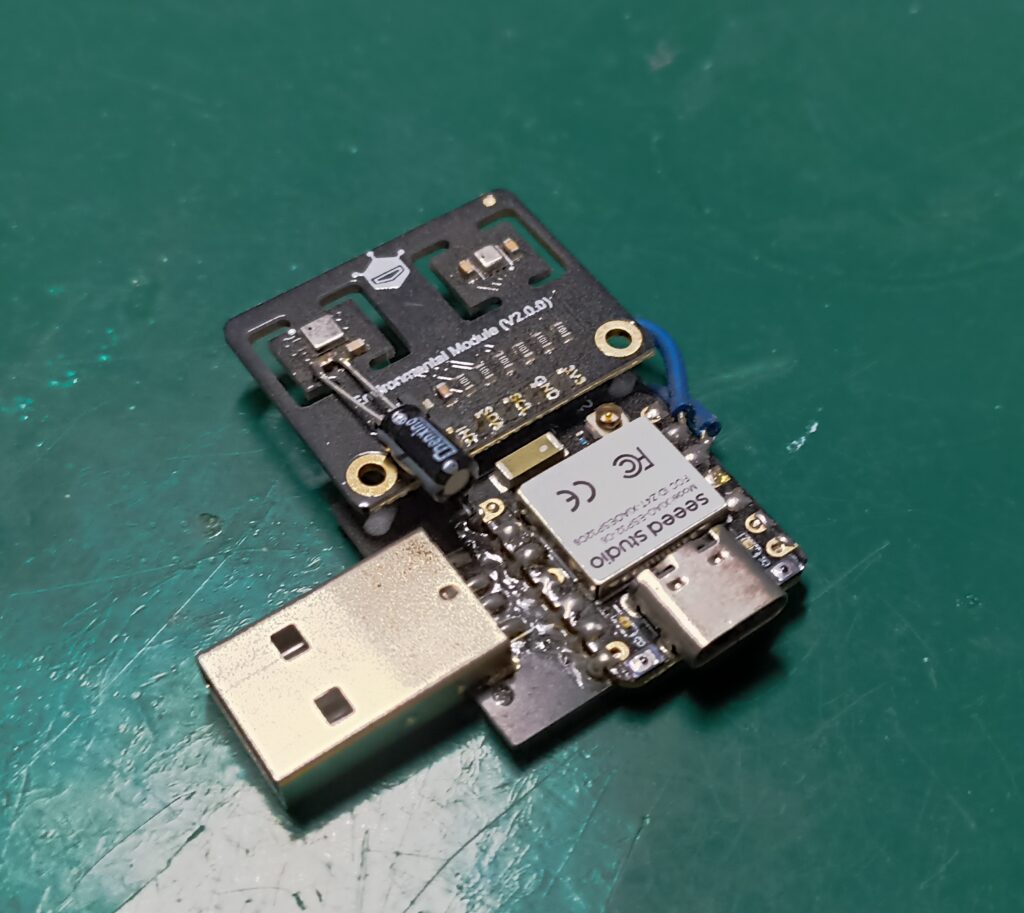
That electrolytic capacitor soldered on top of things is for power supply stability, specially for the ENS160. Those two blue wires are for inverting SDA and SCL, since this board was originally made for another part number of sensor. Besides that, it is a matter of connecting it to a USB charger and getting it running.
Firmware/code
Things get a little bit busier in here, since all the heavy lifting is done by the *mighty* ESP32 microcontroller. It has to handle WiFi, Telegram, MQTT, NTP and logic, all at once. And don’t get me wrong, it delivers!. As stated before, this project only got to this point because I have implemented it part by part, incrementally.
I have showed you how to read both ENS160 and BME280, then MQTT for Adafruit, then Whatsapp, then NTP and finally Telegram. Full code (along with images) is to be obtained in my Github. I am not posting the full code here for aesthetical reasons, this is too long of a piece of code.
What I will do instead is to comment parts of the code below, so that you grasp what is more important for the whole story. I start by defining addresses for components:
DFRobot_ENS160_I2C ENS160(&Wire, /*I2CAddr*/ 0x53);Also have to define where inside Adafruit.io your MQTT information goes. This is all before even declaring setup().
Adafruit_MQTT_Publish temperaturereadings = Adafruit_MQTT_Publish(&mqtt, AIO_USERNAME "/feeds/temperaturereadings");
Adafruit_MQTT_Publish humidityreadings = Adafruit_MQTT_Publish(&mqtt, AIO_USERNAME "/feeds/humidityreadings");
Adafruit_MQTT_Publish pressurereadings = Adafruit_MQTT_Publish(&mqtt, AIO_USERNAME "/feeds/pressurereadings");
Adafruit_MQTT_Publish aqireadings = Adafruit_MQTT_Publish(&mqtt, AIO_USERNAME "/feeds/aqireadings");
Adafruit_MQTT_Publish tvocreadings = Adafruit_MQTT_Publish(&mqtt, AIO_USERNAME "/feeds/tvocreadings");
Adafruit_MQTT_Publish eco2readings = Adafruit_MQTT_Publish(&mqtt, AIO_USERNAME "/feeds/eco2readings");
Inside setup() I start the BME280 in its correct address:
bme.begin(0x76, &Wire);Then I verify for WiFi connection in every single loop(). So that I can connect to it if not already.
if (WiFi.status() != WL_CONNECTED) {I have a LED blinking every 200 miliseconds, just to make sure the code is running in a visual way. If the code got stuck somewhere the LED stops blinking.
if(millis() - oldtimeled > 200){
    oldtimeled= millis();
    digitalWrite(15, !digitalRead(15));
  }
Now I start reading sensors and publishing values to MQTT, even implementing a serial.print() way of verifying the correct execution of it.
if (! temperaturereadings.publish(temp)) {
      Serial.println(F("Failed"));
    } else {
      Serial.println(F("OK!"));
    }
Finally publishing to Telegram APP
I execute the full code every 60 seconds, including reading all sensors and publishing to Adafruit’s MQTT.
if(millis() - oldtime >= 60000){ // 60 secondsBut have decided that I just wanted to receive Telegram messages every six (6) hours. That is to neither pollute my cellphone notifications nor divert my attention too often. This is the way I implemented it, I read time via NTP and store hours in “h” and minutes in “m”.
Then I just compare to see whether “0”, “6”, “12” or “18” hours (in 24h format) have been achieved. I then check whether minutes “0” or “1” of the hour are current, to be able to do “bot.sendMessage()” to Telegram. The reason I use minutes “0” or “1” is because since my code executes every 60 seconds, it could happen that it executes exactly at seconds “0” and “60” of the “0” minute.
So if the code does not run at minute “0”, it runs at minute “1” for sure. Finally at minutes “2” or “3” of the hour I reset the control varible “hasnotpassedhere”, so that the whole process can happen again in six (6) hours.
getLocalTimeVars(h, m); // NTP server "get time" function

    if ((h == 0 || h == 6 || h == 12 || h == 18) && (m == 0 || m == 1)) {  // Send message at 0h, 6h, 12h and 18h, 0 minutes or 1 minute (only once though)
      if(hasnotpassedhere == 1){ // guarantees that the message is sent only once
        hasnotpassedhere = 0;
        bot.sendMessage(CHAT_ID, "Temperature= " + String(temp) + " oC" + "\n Humidity= " + String(hum) +"%");
      }

    }else if((h == 0 || h == 6 || h == 12 || h == 18) && (m == 2 || m == 3)){ // on minute 2 or 3 it will reset the "send message" counter
      hasnotpassedhere = 1;
    }
Final thoughts
One thing important to mention is that you are handling various private and sensitive services here. The likes of WiFi connection, Adafruit.io MQTT access and Telegram API access comprise sensitive information of yours. The full Arduino code in this link is stripped of any personal information of mine.
You have to insert your own information there, this means creating an Adafruit.io account, inputting your WiFi password in the Arduino IDE code and registering to Telegram APP. Also note that for using NTP you have to provide your local time, as for me in GMT-3 below.
const char* ntpServer = "pool.ntp.org";
const long  gmtOffset_sec = -10800; // (180 * 60) GTM-3 for Brazil
const int   daylightOffset_sec = 0; // no daylight savings time
With all your sensitive and private information added to the Arduino IDE sketch, just hit “Compile and Flash” button. Full code got around 300 lines of code. As stated in other posts of mine, you can check the data generated by this project with your favorite MQTT broker APP. In my case I installed on called “MQTT Dash”, which is free.
Let’s see how this project turned out?.


Pingback: Cellphone notifications with ESP32 - FritzenLab electronics