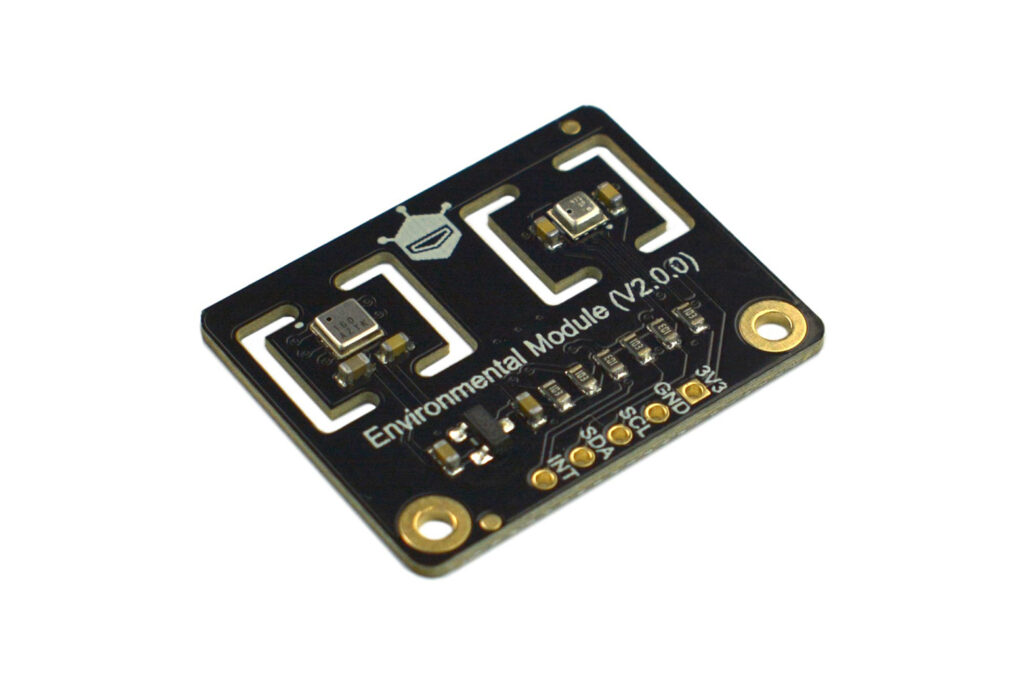
Today’s post is all about a sensor kit from DFRobot, the ENS160 + BME280 Environmental Sensor. Those two sensors are very precise and useful for (mostly indoor) weather stations. Bosch’s BME280 (whose datasheet is here) is a temperature, humidity and atmospheric pressure one.
ENS160 is a specialized multi-gas sensor from ScioSense, capable of giving CO2 equivalent, VOC (volatile organic compounds) and AQI (air quality index). Its datasheet is here. Both sensors communicate via i2c to virtually any microcontroller (I am using a Xiao ESP32-C6 this time). I will write an example code using Arduino IDE, to read both sensors and print information on screen.
One could surely create an indoor weather station using both sensors, in fact that was the intention of DFRobot when developing this kit. You can buy it from here if you want.
Hardware
As stated above I am using a SeeedStudio Xiao ESP32-C6 for this prototype. You could use virtually any microcontroller, since all you need is the i2c port and two more GPIO. ENS160+BME260 sensor kit can be acquired from DFRobot in their official site (linked above). Today’s prototype will be assembled with the help of a 400-points breadboard, containing an ESP32-C6, the ENS160+BME280 environmental sensor kit and a LED+resistors+push button combo (just for blinking).
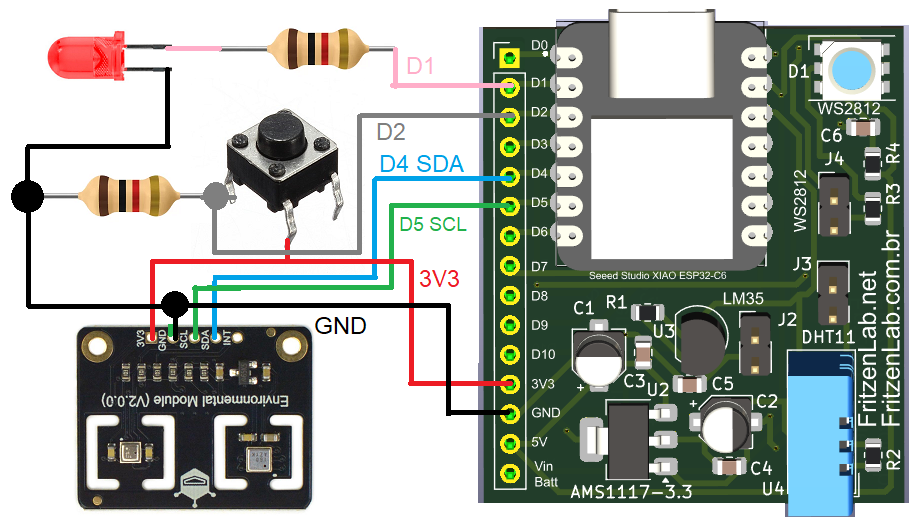
Schematic diagram for this assembly is seen below, complete with the LED and push button (not strictly necessary but cool). All the LED+push button will do is blink when button pressed once and off when button pressed again.
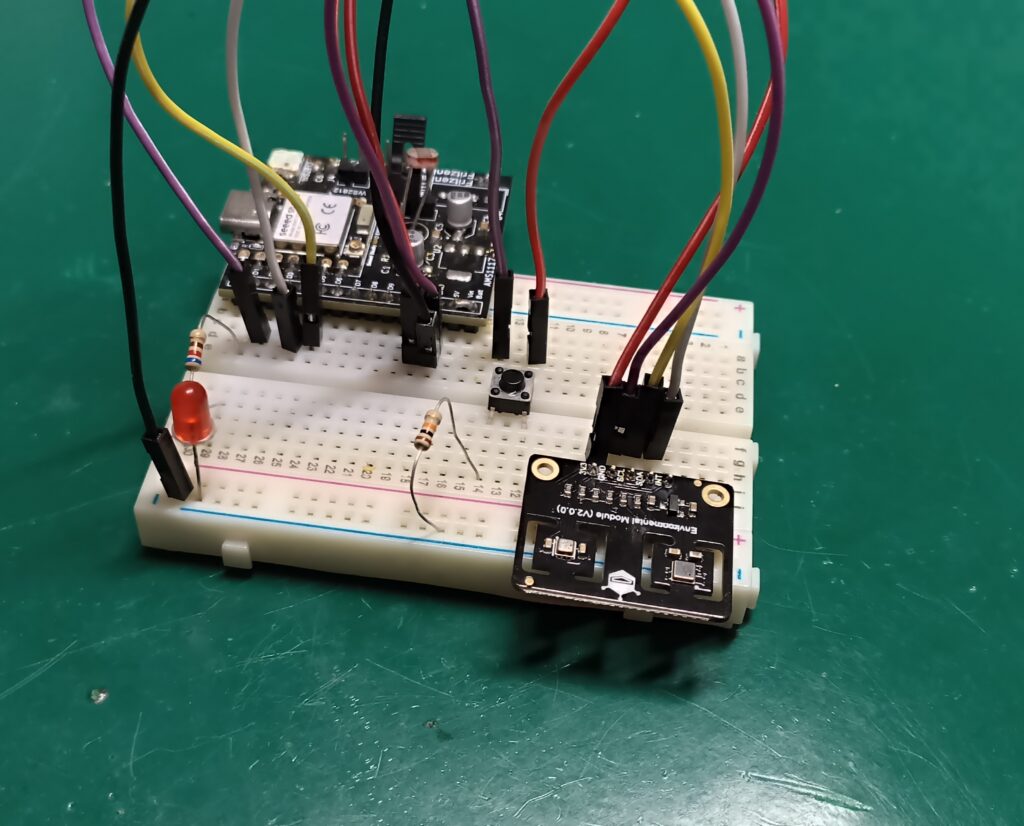
There is also a picture of my setup. It shows everything assembled on top of the 400-point breadboard.
The sensors
Now talking a bit about the ENS160, which is essentially a gas sensor that is very specialized. It reads TVOC, or total volatile organic compounds. It comprises a bunch of organic gases (the ones whose composition has carbon, essentially). ENS160 also gives us AQI or air quality index, which is a number between one (1) and five (5). One means air with high quality and five with very poor quality. This is a very specialized sensor, used mostly in indoor air quality sensing and control.
BME280 in the other hand is a humidity, temperature and atmospheric pressure sensor. It could be used in drones or any machines that need to sense atmospheric pressure and altitude. It operates from -40ºC to +85ºC, 0-100% relative humidity and 300-1100 hPa. The fact that DFRobot put both sensors together in a PCB shows how applicable and easy to use they are.
Coding/firmware
Both ENS160 and BME280 are i2c sensors, need libraries in order to work with Arduino. I am using Arduino IDE 2.3.5 but you can use any other of the (newer) versions (over 1.8 I would say). We will have to install both libraries in order for the code to compile. Go to “Sketch > Include library > manage libraries” and type “ENS160”. Install the one from DFRobot.
Do the same thing and now type “BME280”, installing the one from Adafruit. The code below was created by me, but I got a lot of inspiration from examples supplied with both libraries. If you want to test the sensors individually do “File > Examples > Adafruit BME280 library > bme280test”. Also “File > Examples > DFRobot_ENS160 > getMeasureData”.
The code presented below comprises the reading of both sensors, besides reading a push button and blinking an LED. All of that is accomplished without the use of delay(), so all non-blocking code. Such readings happen every one second, as controlled by the “delayTime” variable. The rest of the time (when not reading sensors) the processos can read the button and control the LED, what takes almost no time.
This means that the processor is mostly free in my code, no costly “delay()” functions. Complete code is seen below, copy it and paste into your Arduino IDE software.
#include <Wire.h>
#include <SPI.h>
#include <Adafruit_Sensor.h>
#include <Adafruit_BME280.h>
#include <DFRobot_ENS160.h>

#define BME_SCK 13
#define BME_MISO 12
#define BME_MOSI 11
#define BME_CS 10

#define SEALEVELPRESSURE_HPA (1013.25)

#define led D1
#define button D2

DFRobot_ENS160_I2C ENS160(&Wire, /*I2CAddr*/ 0x53);
Adafruit_BME280 bme; // I2C
//Adafruit_BME280 bme(BME_CS); // hardware SPI
//Adafruit_BME280 bme(BME_CS, BME_MOSI, BME_MISO, BME_SCK); // software SPI

unsigned long delayTime;
long previousTime= 0;
bool detectionDelay= false;
bool previousButton= false;
bool buttonDetection= false;
long previousTimeLed= 0;
bool turnLedOn= false;
long detectionTime= 0;

void setup() {
    Serial.begin(9600);
    while(!Serial);    // time to get serial running
    Serial.println(F("BME280 test"));

    unsigned status;

    // default settings
    //status = bme.begin();
    // You can also pass in a Wire library object like &Wire2
    status = bme.begin(0x76, &Wire);
    if (!status) {
        Serial.println("Could not find a valid BME280 sensor, check wiring, address, sensor ID!");
        Serial.print("SensorID was: 0x"); Serial.println(bme.sensorID(),16);
        Serial.print("        ID of 0xFF probably means a bad address, a BMP 180 or BMP 085\n");
        Serial.print("   ID of 0x56-0x58 represents a BMP 280,\n");
        Serial.print("        ID of 0x60 represents a BME 280.\n");
        Serial.print("        ID of 0x61 represents a BME 680.\n");
        while (1) delay(10);
    }
    while( NO_ERR != ENS160.begin() ){
      Serial.println("Communication with device ENS160, please check connection");
      delay(3000);
    }
    ENS160.setPWRMode(ENS160_STANDARD_MODE);
    ENS160.setTempAndHum(/*temperature=*/25.0, /*humidity=*/50.0);

    Serial.println("-- Default Test --");
    delayTime = 1000;

    Serial.println();
    pinMode(led, OUTPUT);
    pinMode(button, INPUT);
}


void loop() {

  if((millis() - previousTime) > delayTime){ // only enters the sensors function every "delayTime"
    previousTime= millis();
    printValues();
    uint8_t Status = ENS160.getENS160Status();
    Serial.print("Sensor operating status : ");
    Serial.println(Status);
    uint8_t AQI = ENS160.getAQI();
    Serial.print("Air quality index : ");
    Serial.println(AQI);
    uint16_t TVOC = ENS160.getTVOC();
    Serial.print("Concentration of total volatile organic compounds : ");
    Serial.print(TVOC);
    Serial.println(" ppb");
    uint16_t ECO2 = ENS160.getECO2();
    Serial.print("Carbon dioxide equivalent concentration : ");
    Serial.print(ECO2);
    Serial.println(" ppm");
    ENS160.setTempAndHum(/*temperature=*/bme.readTemperature(), /*humidity=*/bme.readHumidity());
  }

  buttonDetection= digitalRead(D2);

  if(millis() - detectionTime > 400){
    detectionDelay= false;
    previousButton= false;
  }else{
    detectionDelay= true;
  }

  if(buttonDetection && !previousButton && !detectionDelay){
    previousButton= true;
    detectionTime= millis();
    turnLedOn= !turnLedOn;
  }

  if((millis() - previousTimeLed > 200) && turnLedOn){
    previousTimeLed= millis();
    digitalWrite(led, !digitalRead(led));
  }else if(!turnLedOn){
    digitalWrite(led, LOW);
  }


}


void printValues() {
    Serial.print("Temperature = ");
    Serial.print(bme.readTemperature());
    Serial.println(" °C");

    Serial.print("Pressure = ");

    Serial.print(bme.readPressure() / 100.0F);
    Serial.println(" hPa");

    Serial.print("Approx. Altitude = ");
    Serial.print(bme.readAltitude(SEALEVELPRESSURE_HPA));
    Serial.println(" m");

    Serial.print("Humidity = ");
    Serial.print(bme.readHumidity());
    Serial.println(" %");

    Serial.println();
}
There are a couple of details to this code, ones you should be aware of. First one is the i2c addresses, which could be different depending on where you buy the sensors from. ENS160 has the address 0x53 and BME280 has 0x76, both have to be manually entered into the code (I have done that for you in the code above).
Another detail is that the ENS160 needs temperature and humidity values to work properly. I implemented the function below, feeding such values from the BME280 into the ENS160. You could also just input constants (say 25 to temperature and 60 to humidity).
ENS160.setTempAndHum(/*temperature=*/bme.readTemperature(), /*humidity=*/bme.readHumidity());Also the BME280 needs you to enter the atmospheric pressure at sea level closest to your location. This unfortunately has to be done via a constant, seen in the code below.
#define SEALEVELPRESSURE_HPA (1013.25)Another detail is how “slow” the ENS160 is: its datasheet states that it can produce readings one second after power up, but it takes one hour to enter into power up state. Full operation is achieved only after 48 hours, what seems a lot in terms of bench tests like the ones we are doing. There are four states excursioned by the sensor, which are printed in the Arduino IDE’s serial monitor together with the readings. They are “0” operating, “1” warm-up, “2” initial start-up and “3” no valid output.
So do not expect precise or repetible readings from this sensor at all. Unless you leave it running for long periods of time.
Experiment and results
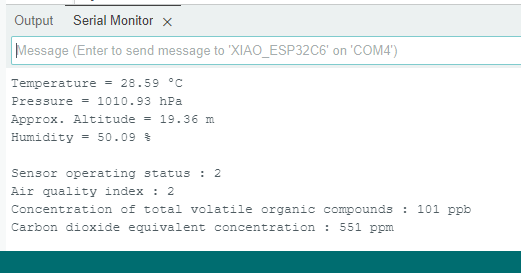
Upon uploading the code above from the Arduino IDE to the ESP32-C3, open the IDE’s serial monitor. You should start seeing something like in the image below, every one second.
I had difficulties with making the ENS160 work, it kept giving me “0” readings. I found this forum thread that solved my problem: place a 47uF capacitor between 3V3 and GND, close to the ENS160.
I made a video explaining the entire process, so you can replicate this setup at home. Enjoy this article and visit DFRobot to buy this kit.


