Today’s post will teach you how to master buttons and LEDs with microPython. We are using the Raspberry Pi Pico 2 and Thonny IDE for the job. The idea is to show you a way of not using time.sleep(), which blocks code execution. I also show you how to use “print()” to print texts and variables into the Thonny IDE shell (“serial monitor” in Arduino words).
Our circuit and code will do the following: on the first press of the push-button, LED is going to start blinking. Upon the second push it will stop blinking. An that way it goes, for every push of the push-button the LED will either start or stop blinking. We are not using any delay function (or time.sleep() in microPython) this time. Our method of controlling the time of choice is to use time.ticks_ms() to keep track of time.
This way we can implement as many IF statements as necessary to enter “functions” in the right time and place.
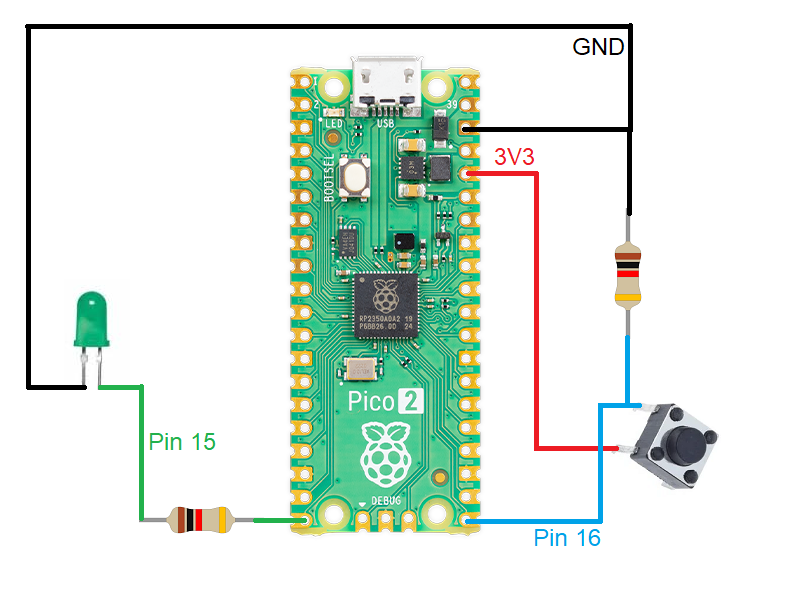
Schematic diagram
As usual here on the blog, schematic diagrams are simple and straightforward. This time all we need are two 1k Ohm resistors, one push-button and one LED. Push-button will be connected to pin 16 of the Raspberry Pi Pico 2 and LED to pin 15.
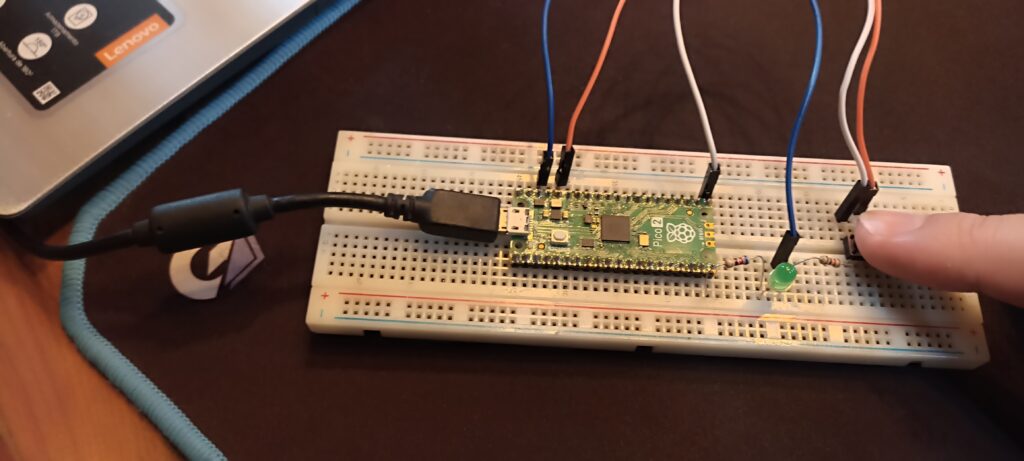
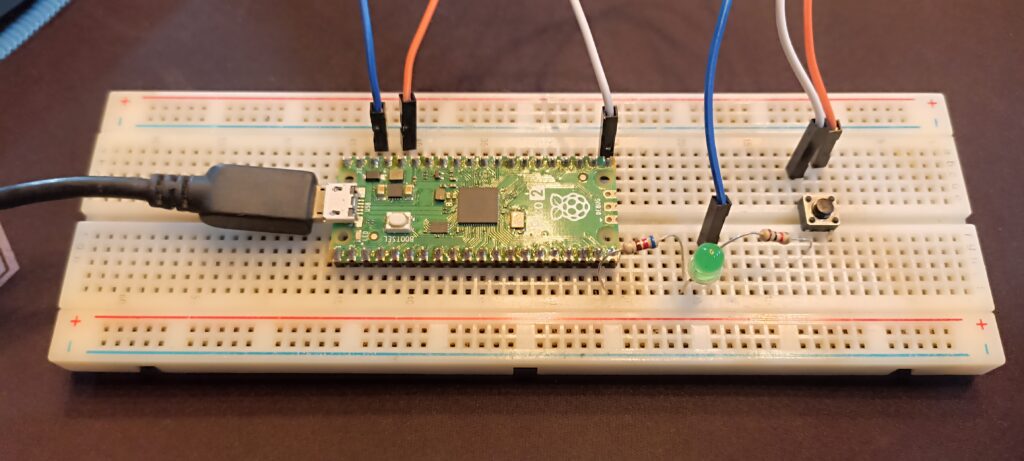
This is how the assembled circuit looks like, I used an 830-point breadboard. You could totally use a 400-point one, no worries. If you want to acquire the Raspberry Pi Pico 2, click here.
Firmware/code
As previously stated, we are using Thonny IDE and programming in microPython. It is a pretty easy to learn language and works well on most microcontrollers applications. Copy the code below and paste it ito a new file in Thonny IDE. Then “save it as” inside the Pi Pico with the name “main.py”. You are on your way to master buttons and LEDs
import machine
import time


led = machine.Pin(15, machine.Pin.OUT)
button= machine.Pin(16, machine.Pin.IN)

def main():

    ledtime= time.ticks_ms() #https://docs.micropython.org/en/latest/library/time.html
    buttontime= time.ticks_ms()
    counting= 0
    ledon= False
    laststate= 1
    buttonon= False
    clicks= 0

    while True:

        if time.ticks_diff(time.ticks_ms(), ledtime) > 200 and ledon == True: # this IF will be True every 2000 ms
            ledtime= time.ticks_ms()

            led.value(not led.value())

        if time.ticks_diff(time.ticks_ms(), buttontime) > 20: # this IF will be True every 2000 ms
            buttontime= time.ticks_ms()

            if button.value() == 1 and laststate == 0:
                clicks+= 1
                print("LED state changed")
                print("clicks: " + str(clicks))
                laststate= 1
                ledon = not ledon
                buttonon= True


            if buttonon == True and counting < 20:
                counting+= 1

            else:
                counting= 0
                buttonon= False
                laststate= 0

main()
Final result
Now it is time to run the code. At the top left of the screen there is a green arrow (Run current script (F5)), press it. Now go to the assembly and press the push button. You will see the LED start blinking. After some time press the button again, the LED should stop blinking.


