This is part two of dominate programming STM32 Bluepill with Arduino, using a USB to serial converter as the programmer. Arduino IDE will be our software of choice, I used the 2.3.5 nightly version. You can use literally any version, I even tested this on 1.8.x. When you buy a new Bluepill with STM3F103 you have to burn a bootloader to it. Look at this blog post (part of of this series) of mine to see how to do it.
Once you burn the bluepill bootloader into the board (seen here, using the STM32CubeProgrammer), implement the circuit illustrated below. It will serve for us to flash the board with our Arduino code.
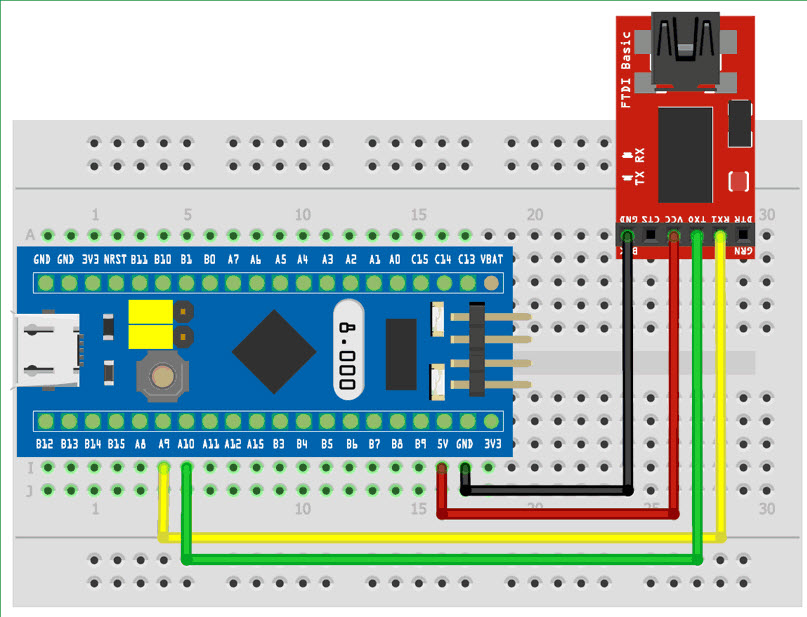
You are going to connect 5V coming from the USB-to-serial converter into the 5V pin of the bluepill, same for GND. Then the yellow wire is RX of the USB-to-serial which goes to PA9 (TX). Green wire is PA10 of the bluepill (RX) which goes to USB-to-serial TX. Now regarding the jumpers of the board, there are two and they are important to us.
Essentially for us BOOT1 is going to stay in position 0, never needing to move it. BOOT0 in the other way will be put to “1” for flashing a new program, then back to “0” to run the program. Look at the image below.
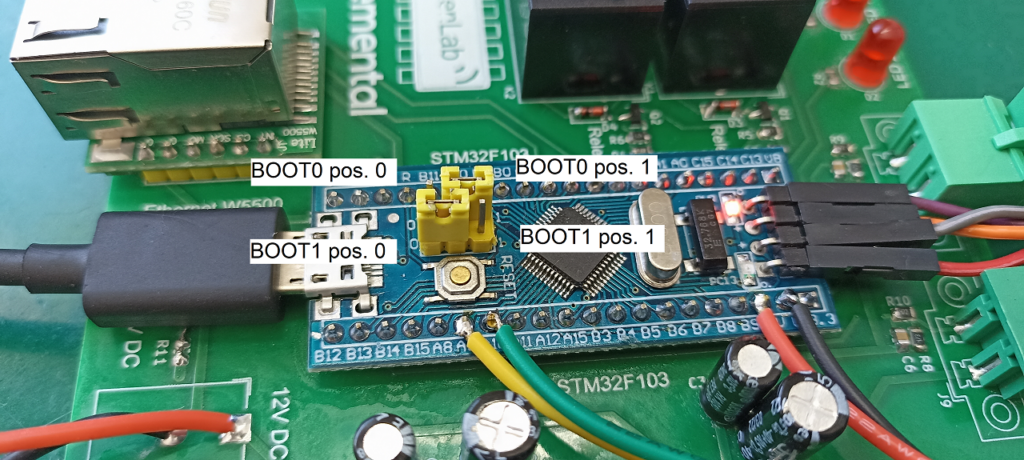
So the procedure is every time you want to upload new code from the Arduino IDE, turn the board off and put BOOT0 in position “1”. BOOT1 has to remain in position zero. Then re-supply the board with 5V or 3.3V and you can flash new code.
Arduino IDE configuration
This is another step into your journey to dominate programming STM32. Now that the board is on and with BOOT0 in position “1”, in Arduino IDE go to menu “Tools” and make the configurations/options look like the image below.
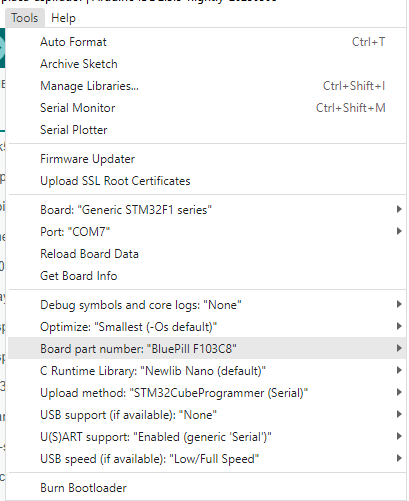
In “board” select “STM32F1 series”, in “Board part number” select “BluePill F103C8” and in “Upload method” do “STM32CubeProgrammer (Serial)”. Get you code ready and briefly press the bluepill’s reset button. I figured I had to do that to my board (press the reset button before flashing it) otherwise it would not flash.
Then just click “upload” button like you would normally with any other Arduino. If everything goes to plan you should see you code running in the bluepill in seconds.


