Let’s study how to read DHT11 , the simplest temperature sensor with microPython, using a Raspberry Pi Pico 2 (RP2350). DHT11 is an integrated sensor capable of reading temperatures between 0ºC and 50ºC and humidity between 20% and 90% relative humidity (RH). It uses a sort of “one wire” communication protocol.
We have studied this sensor before here, with ESP32 as the microcontroller and Arduino code. This time we will be programming it with microPython, since I have been tinkering around with it a lot these days (as seen here and here).
Hardware
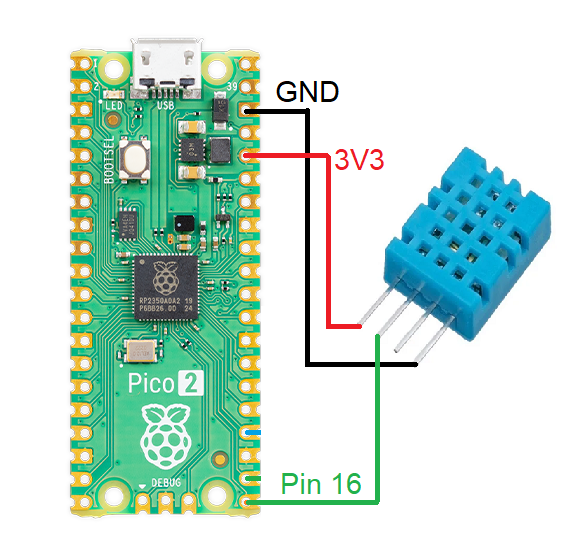
As it is practice here in the blog, schematic diagrams for experiments are very simple and clean. In today’s case for DHT11 (the simplest temperature sensor) all you need are three wires: Pin 16, 3V3 and GND. Note that I am using pin 16 but you can use virtually any pin, this is not critical. That is due to the fact that DHT11’s library does soft communication, there is no (for example) i2c, serial or SPI involved.
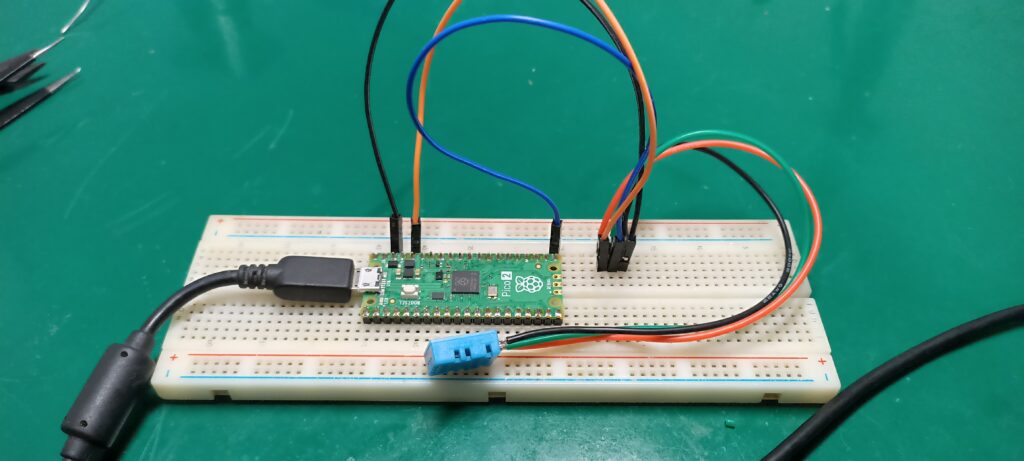
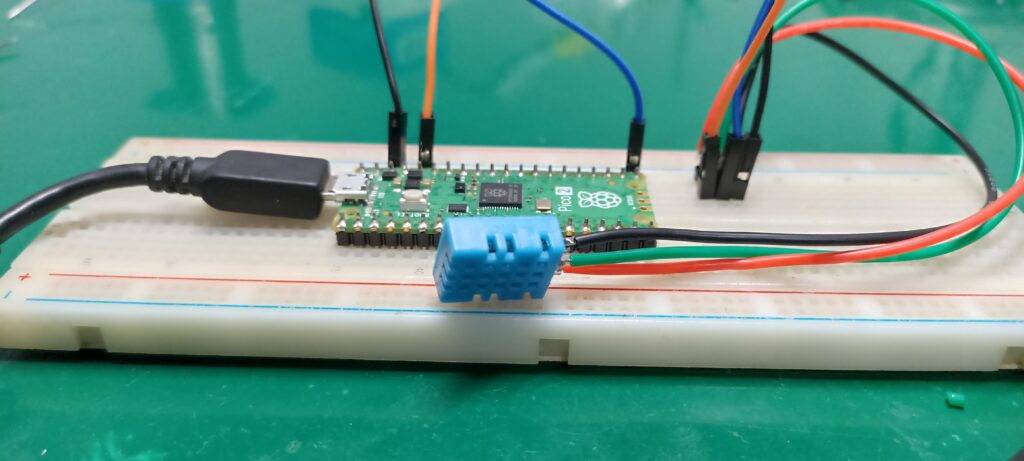
Below you see two images of the assembly I did in my bench. I soldered DHT11 on long wires just for jun, that is not necessary on your part. Also note that there is no 10k Ohm resistor between 3V3 and signal pin; I am really not sure how and why, all I know is that is works this way.
Code/firmware
Code for this experiment was heavily modified by me, but it is not originally mine. File “main.py” idea comes from here, while the necessary library is obtained from within the Thonny IDE software. It is called “DHT” and can be obtained by going to “Tools > Manage packages…” menu and type “DHT”. Click “install” and wait for the process to finish.
Full code is shown below for “main.py”. Note that it does not use “time.sleep()”, instead I implemented a non-blocking way of timing the code. It uses time.tick_ms() to keep track of the current and previous time the IF statement was entered. I enter the main code function every 2000ms (2 seconds) and make a single reading request to the DHT11 every time.
from machine import Pin
import time
import dht

sensor = dht.DHT11(Pin(16))
initialtime= time.ticks_ms() #https://docs.micropython.org/en/latest/library/time.html

while True:
    try:
        currenttime= time.ticks_ms() #Every time it passes here, gets the current time
        if time.ticks_diff(time.ticks_ms(), initialtime) > 2000: # this IF will be true every 2000 ms
            initialtime= time.ticks_ms() #update with the "current" time

            # The DHT11 returns at most one measurement every 1s
            sensor.measure()
            # Retrieves measurements from the sensor
            print(f"Temperature : {sensor.temperature():.1f}")
            print(f"Humidity    : {sensor.humidity():.1f}")
            # Transmits the temperature to the computer console
    except OSError as e:
        print('Failed reception')
        # If the Pi Pico 2 does not receive the measurements from the sensor
End result
Function “sensor.measure()” is responsible for starting the measurement, then “sensor. temperature()” and “sensor.humidity()” brings us the desired values. Note that the code uses f-strings (f”{}”) to be able to insert variables inside the string, even defining the number of decimais to one (1).
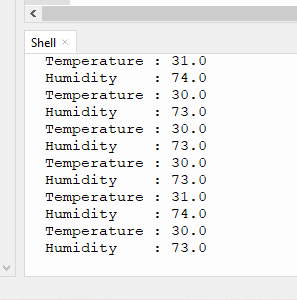
Go to your Thonny IDE and observe the shell, in the bottom part of the screen. It has to be printing something like in the image below. Both temperature and humidity are printed with 1 decimal every two (2) seconds. The simplest temperature sensor is now showing its value once more.
If you do not see anything like that, have a look at your wiring (data to pin 16, 3V3 and GND) and make sure you have the DHT library installed correctly (go to “Tools > Manage packages” and look at the left part of the screen, “DHT” has to be there). I made a quick video showing you the experiment, enjoy.
If you want to buy the DHT11 sensor or even the Raspberry Pi Pico 2, use my affiliate links here and here.


