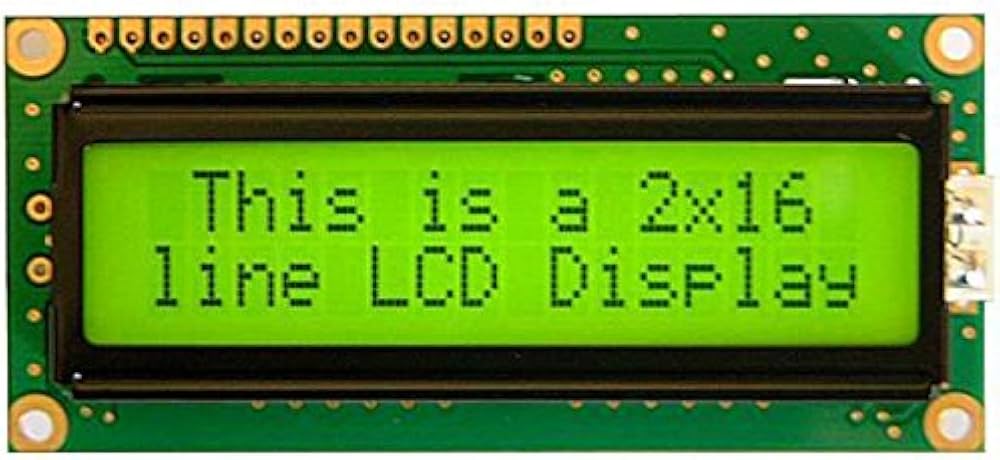
Let’s connect and use a 16×2 LCD display with ESP32 and Arduino code. The idea is learn how to show text and Arduino variables on a 16 columns by 2 lines liquid crystal display. These little displays work by applying small voltages to liquid crystals, which get polarized thus reflecting or not some light.
We are going to be controlling a LCD display based on the Hitachi HD44780 driver, very well known and with many libraries available. It can be controlled by 8bit or 4bit, meaning that with 4bit you can have a little less characters to show (but not really much less).

Schematic diagram
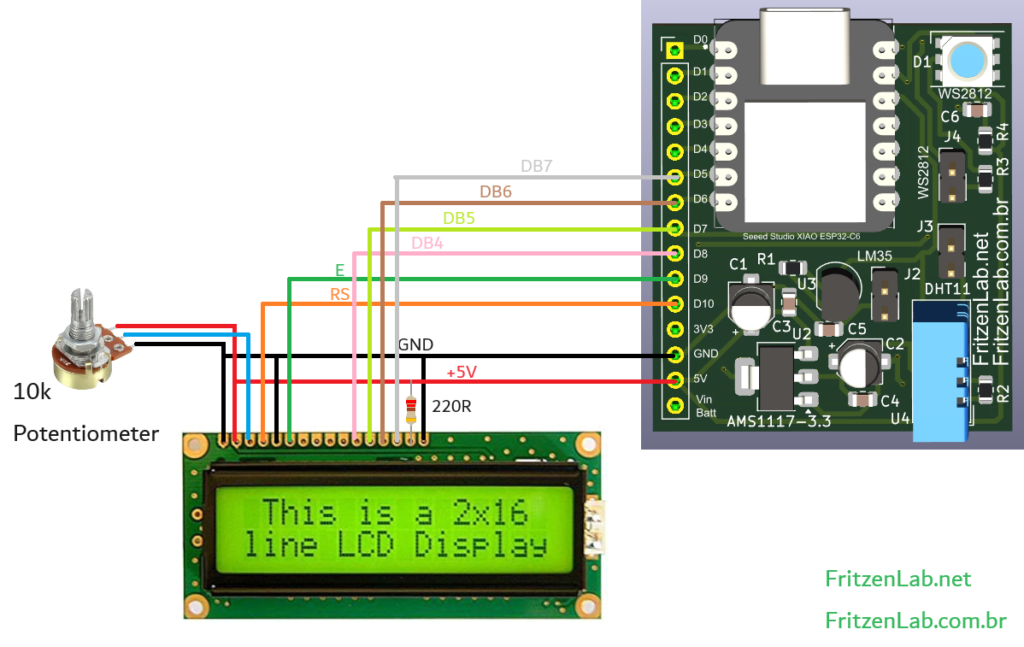
As stated, we are controlling our LCD in this example via 4bit, in this case D5(DB7), D6(DB6), D7(DB5) and D8(DB4). I got a lot of pinout information form here. Other pins necessary are:
- A potentiometer for LCD contrast control. Without this, it would be impossible to see anything on the display
- RS alternated between commands and data
- R/W is connected to GND, meaning is always in read mode
- E is enable
- There is also a backlight supply, via 5V and a 220R resistor

There is also the possibility of using i2c for display control (only two pins), but this is a subject for a future post. At this time let’s stick with the schematic diagram above. Also notice that I am using my own ESP32-C6 dev board, but you can use any board that runs Arduino code.
The code
Talking about code, let’s see what is necessary to make this kind of display work. I got code inspiration from this source, which uses the LiquidCrystal library. This one already comes with the Arduino IDE.
Code is just simple, at least for what we want to achieve. You first call
LiquidCrystal lcd(D10, D9, D8, D7, D6, D5);For pinout configuration (look at the schematic diagram above), then do
lcd.begin(16, 2);initializing it at 16 columns and 2 lines. Then you can do either “.clear()”, “.setCursor(column, line)” and “.print(variable or text)”. That’s about it.
//Program: 16x2 LCD Display
//Author: MakerHero

#include <LiquidCrystal.h>

LiquidCrystal lcd(D10, D9, D8, D7, D6, D5);

void setup()
{
  lcd.begin(16, 2);
}

void loop()
{

  lcd.clear();

  lcd.setCursor(1, 0);

  lcd.print("FritzenLab.net");
  lcd.setCursor(3, 1);
  lcd.print(" LCD 16x2");
  delay(5000);

}
In the above example we are writing “FritzenLab.net” at line 0 (the first) column 1, and “LCD 16×2” at line 1 (the second) and column 3. The video below illustrates this code very well, enjoy.
Final words
It is also possible to do other more ellaborate things with such LCD display, as for example custom characters and animations. This is not the focus of this article, all I want to show you is basic utilization and control of it.
If you want to acquire a LCD display for testing, use my Aliexpress affiliate link here.


Leave a Reply