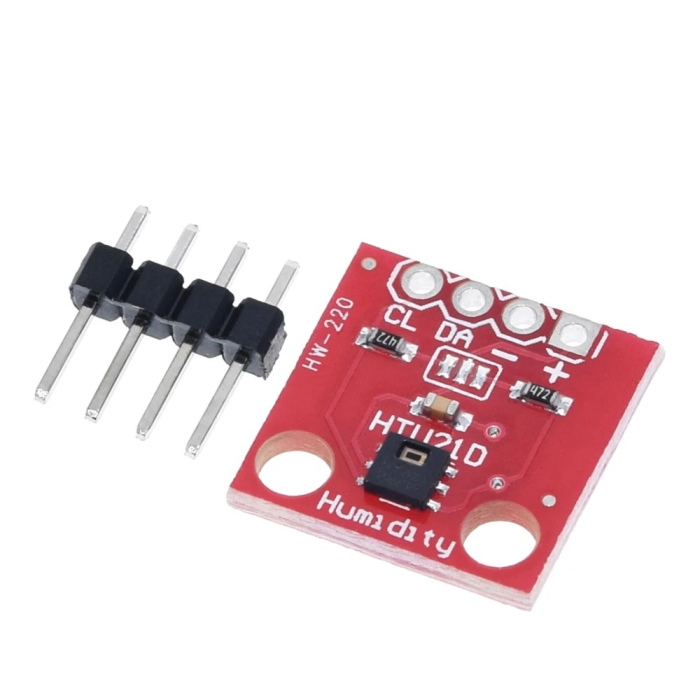
Today we will talk about using the HTU21D temperature sensor with ESP32. This sensor features temperature and humidity readings via i2c protocol. It is capable of reading temperatures in the range of -40ºC to +125ºC and humidity between 0% and 100% in a small form factor.
It is made by Measurement specialties and works between 1.5V and 3.8V. Measurements take up to 16ms (miliseconds).This is the sensor I am going to be using in my WiFi/USB thermometer project. As stated it uses i2c for communication, so it only needs two pins: SDA and SCL, besides the necessary 3.3V and GND.
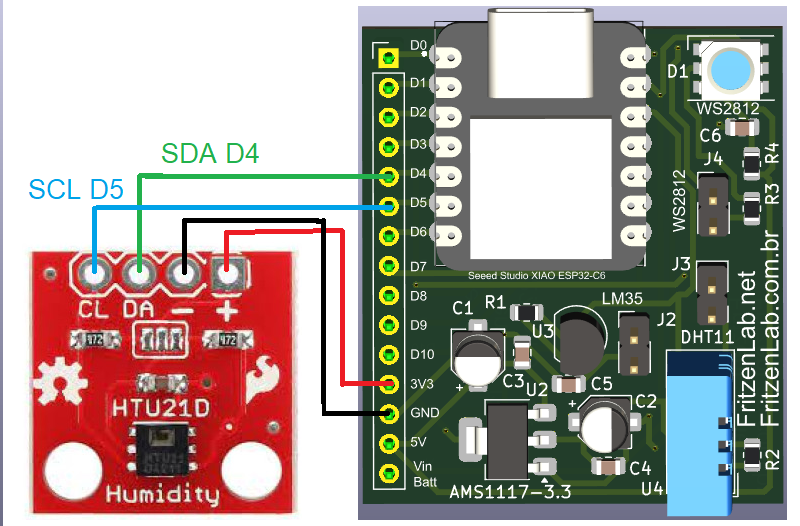
Schematic diagram and connections
We will be using my ESP32-C6 dev board for today’s experiment, more details here. It is based around the SeeedStudio Xiao ESP32-C6 and also features a DHT11 temperature sensor, a WS2812b Neopixel and a LDR light sensor.

Coding for controlling it
Code was taken from here, it uses an Adafruit library for the heavy lifting. In the Arduino IDE go to the libraries manager and type “HTU21D”, install the Adafruit one. Then go to “File > Examples” and find the Adafruit HTU21D one, seen below.
#include <Wire.h>
#include "Adafruit_HTU21DF.h"

Adafruit_HTU21DF htu = Adafruit_HTU21DF();

void setup() {
  Serial.begin(115200);

  if (!htu.begin()) {
    Serial.println("Check circuit. HTU21D not found!");
    while (1);
  }
}

void loop() {
    float temp = htu.readTemperature();
    float hum = htu.readHumidity();
    Serial.print("Temperature(°C): ");
    Serial.print(temp);
    Serial.print("\t\t");
    Serial.print("Humidity(%): ");
    Serial.println(hum);
    delay(500);
}
It basically instanciates the sensor (Adafruit_HTU21DF htu = Adafruit_HTU21DF()), starts the i2c and does readings (float temp = htu.readTemperature() and float hum = htu.readHumidity()). This is done every 500ms but you can do it faster or slower, depending on what you want to achieve.
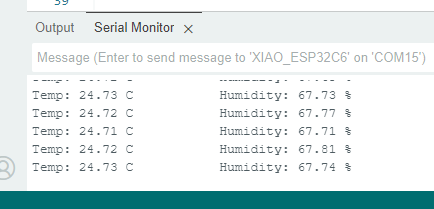
The result is seen below in the Arduino IDE serial monitor: temperature and humidity readings every 500ms. There is no calibration necessary.
Final words
HTU21D is a pretty fast and precise temperature and humidity sensor. If you want to buy one to start experimenting, use my affiliate link here.


Pingback: MQTT protocol with ESP32 and Adafruit.io - FritzenLab electronics