A quick update on the minimalist USB thermometer with ESP32 project of mine. I have now decided which sensor to use and have sent the PCB for manufacturing.
Edit: official product page here.
I had initially thought of using the AHT10 temperature and humidity sensor. But since I have been searching the online stores in Brazil and found it a bit difficult to source. I then found another sensor which is easier to source around here, the HTU21D. It is also cheap (I am paying around US$4 for it) and has stable Arduino libraries.
The schematic and PCB
Having decided on the sensor I cound then finish designing the printed circuit board for the project, which is seen below.
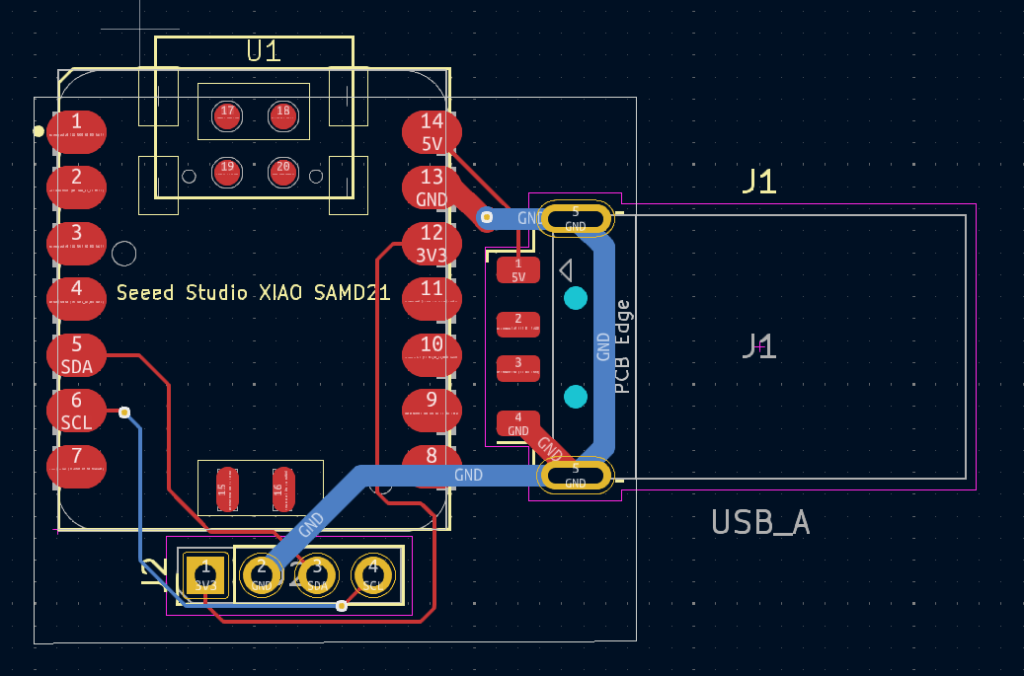
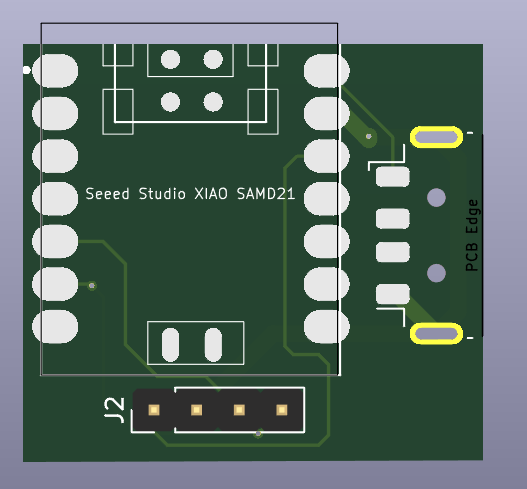
I decided not to use a GND plane on the bottom layer due to the Xiao ESP32-C6 antenna being on board. Then all I did was to route every trace. The GND ones I routed with 1mm width, while the rest was with 20mil.
The HTU21D (J2 in the picture above) sensor is to be mounted “on top” of the Xiao ESP32-C6, making the whole PCB take very little space. USB connector in the PCB is just for power, there is no communication feature. This USB communication is done via the USB-C connector on the Xiao ESP32-C6 (for programming and serial monitor).
Next steps
Now that I have sent the PCB for manufacturing at , all I have to do is wait. It takes those PCB’s between 30 and 60 days to get to my hands in Brazil. I will not be starting coding right now, since it is simple enough that it can be done when I assemble the prototype.
My initial idea is to send data either to Thingspeak or Adafruit, but I may contact other paid services for a partnership. See you next time.


