Today’s subject is the Laser distance sensor VL53L0x from ST semiconductos. It is a distance sensor that uses laser (non-visible) and is capable of measuring up to two (2) meters. If you want to read its datasheet, it is here.

It has such technology that it almost doesn’t matter the color and reflectance of the target object to be measured, it will most likely work. The “caveat” is that it can only be used to detect objects right in front of it.
Also “time of flight” means that it measures the time it takes for light to go away and come back from the target.
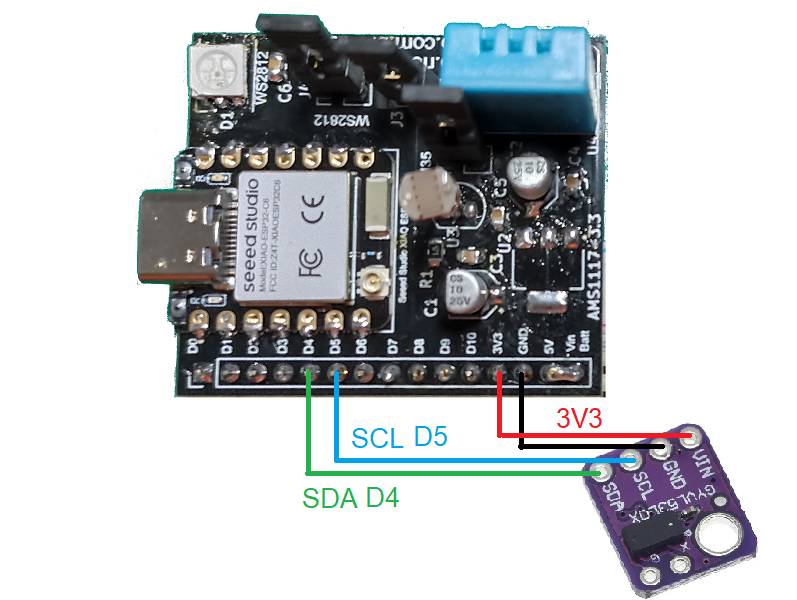
The circuit
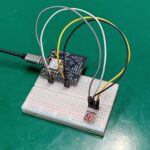
There is no secret to what we are doing here, all you need is the two pins for i2c (SDA, SCL), 3V3 and GND.
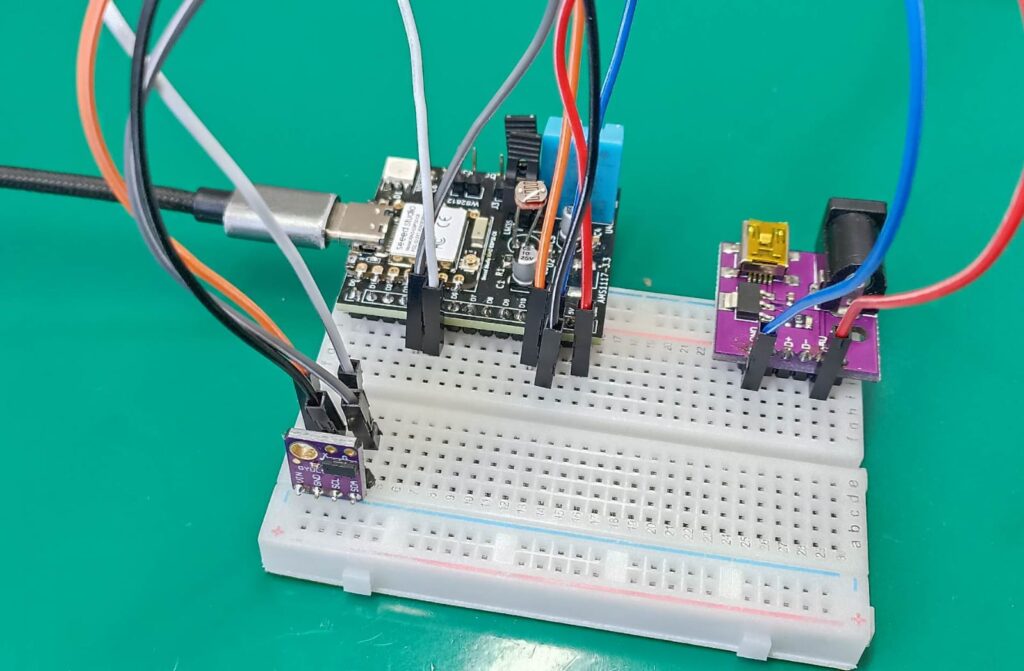
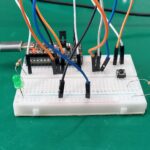
Assembling it on a breadboard resulted in the circuit below, very compact indeed. You can ignore the purple circuit board in the right, it is a 5V to 3V3 AMS1117-3.3 converter not used right now.
The library necessary for this test to work in the Arduino IDE is “VL53L0x by Pololu”. To install it go to “Sketch > Include library > Manage libraries …” and type “VL53L0x by Pololu”.
Testing it out
After installing the library in the Arduino IDE, I opened the “Continuous” example from “File > Examples > VL53L0x > Continuous”. It is seen below. There was no need to change anything on the code.
/* This example shows how to use continuous mode to take
range measurements with the VL53L0X. It is based on
vl53l0x_ContinuousRanging_Example.c from the VL53L0X API.
The range readings are in units of mm. */
#include <Wire.h>
#include <VL53L0X.h>
VL53L0X sensor;
void setup()
{
Serial.begin(9600);
Wire.begin();
sensor.setTimeout(500);
if (!sensor.init())
{
Serial.println("Failed to detect and initialize sensor!");
while (1) {}
}
// Start continuous back-to-back mode (take readings as
// fast as possible). To use continuous timed mode
// instead, provide a desired inter-measurement period in
// ms (e.g. sensor.startContinuous(100)).
sensor.startContinuous();
}
void loop()
{
Serial.print(sensor.readRangeContinuousMillimeters());
if (sensor.timeoutOccurred()) { Serial.print(" TIMEOUT"); }
Serial.println();
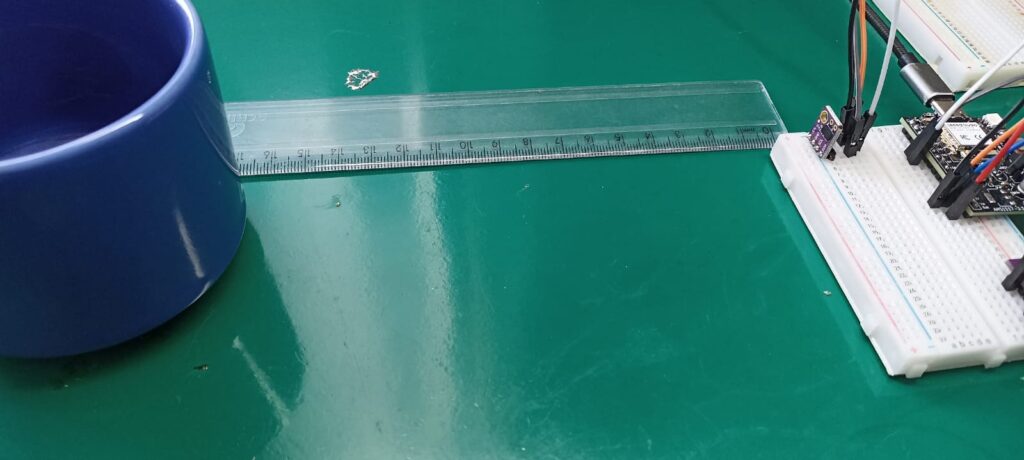
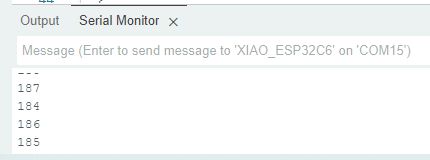
}I positioned a mug within 160-170mm of the sensor (see below) and the measurements from VL53L0x were around 184-187mm. Not too bad but not exactly precise.
Using the Adafruit library in the Arduino IDE gave me similar results, So I will not be showing that to you here. Regarding the measurements differentes, apparently the sensor has its own error that cannot be corrected. I would not be using the sensor as a digital ruler for example, but for small and less accurate measurements it would be just fit.
Final words
For as cheap as this sensor is it delivers rather constant and concise measurements. As we have seen it is not 100% accurate but can be manually corrected if needed (in the sketch).
If you want to know more about “distance” sensors, read about this presence one I wrote some time ago. In case you want to buy the sensor used in this article (VL53L0x) please click in my affiliate link here.


Leave a Reply