We will see how to control the hobby servo motor SG90 with ESP32, also the library and knowledge apply to small most servos. A servo motor is a motor whose control is finer, uses a feedback system for speed and position.
This means you can (as we will see) command it to stop and stay at any angle you desire. This makes the servos very special to obey fine position control. Industrial servos for example can achieve positions of fractions of degrees.
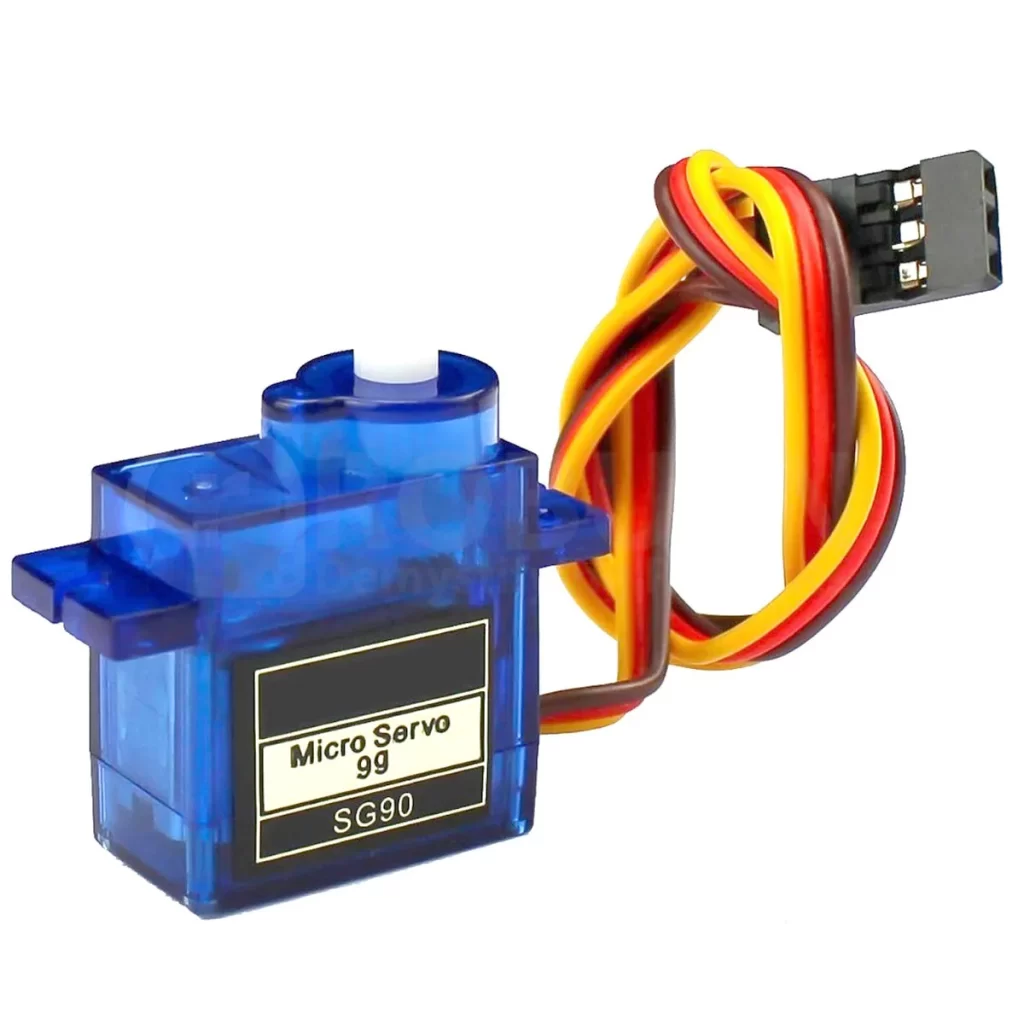
The servo in question at this article is the SG90, a very generic one (that can be bought from here, my affiliate link), whose datasheet is here. It is capable of doing a 180 degree rotation (90 degree for each side) and rotate 60 degrees in 120 milisseconds.It has a force of 1.8 kgf.cm.
The first code we will try has to be installed from within the Arduino IDE. Go to “Sketch > Add library > Manage libraries” and type “ESP32servo”. Install the one from Kevin Harrington; then open the Sweep example by going to “File > Examples > ESP32Servo > Sweep”. The code is replicated below.
Notice we changed the pin number from myservo.attach(9) to myservo.attach(D9) for the ESP32-C6. Upon testing I noticed that pin D9 was not working, then I changed to pin D3, like myservo.attach(D3).
Another important details is the servo power consumption, This source talks about 360mA in stall (so max current). My ESP32-C6 can’t do this current by itself, so we will use an external 5V power supply. Then the ESP32-C6 dev board will be powered by one USB port and the servo by another USB port.
#include <ESP32Servo.h>

Servo myservo;  // create servo object to control a servo
// 16 servo objects can be created on the ESP32

int pos = 0;    // variable to store the servo position
// Recommended PWM GPIO pins on the ESP32 include 2,4,12-19,21-23,25-27,32-33
// Possible PWM GPIO pins on the ESP32-S2: 0(used by on-board button),1-17,18(used by on-board LED),19-21,26,33-42
// Possible PWM GPIO pins on the ESP32-S3: 0(used by on-board button),1-21,35-45,47,48(used by on-board LED)
// Possible PWM GPIO pins on the ESP32-C3: 0(used by on-board button),1-7,8(used by on-board LED),9-10,18-21
#if defined(CONFIG_IDF_TARGET_ESP32S2) || defined(CONFIG_IDF_TARGET_ESP32S3)
int servoPin = D3;
#elif defined(CONFIG_IDF_TARGET_ESP32C3)
int servoPin = D3;
#else
int servoPin = D3;
#endif

void setup() {
	// Allow allocation of all timers
	ESP32PWM::allocateTimer(0);
	ESP32PWM::allocateTimer(1);
	ESP32PWM::allocateTimer(2);
	ESP32PWM::allocateTimer(3);
	myservo.setPeriodHertz(50);    // standard 50 hz servo
	myservo.attach(servoPin, 1000, 2000); // attaches the servo on pin D3 to the servo object
	// using default min/max of 1000us and 2000us
	// different servos may require different min/max settings
	// for an accurate 0 to 180 sweep
}

void loop() {

	for (pos = 0; pos <= 180; pos += 1) { // goes from 0 degrees to 180 degrees
		// in steps of 1 degree
		myservo.write(pos);    // tell servo to go to position in variable 'pos'
		delay(15);             // waits 15ms for the servo to reach the position
	}
	for (pos = 180; pos >= 0; pos -= 1) { // goes from 180 degrees to 0 degrees
		myservo.write(pos);    // tell servo to go to position in variable 'pos'
		delay(15);             // waits 15ms for the servo to reach the position
	}
}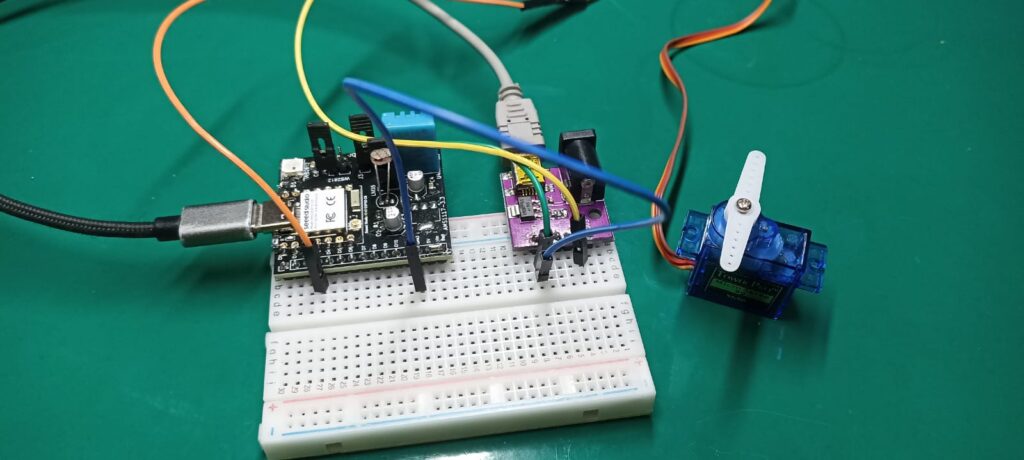
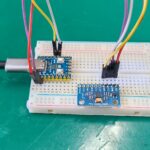
Notice the grain USB cable in the image, this one supplies the servo. The black one in the left supplies and communicates with the ESP32-C6.
The result
In the video below is possible to see the servo doing 90 degrees for each side, then repeating. It is slow and this is normal, since its control is not so fast and its mechanicals are all plastic.
Final words
Controlling a servo with a ESP32-C6 in the Arduino environment is super easy and straightforward. You can use your creativity to come up with more examples, beyond what was shown here.
Want to know about more applications of the ESP32-C6? check this article out. Also if you want to buy one of the servos studied in this article, use my affiliate link.


Leave a Reply