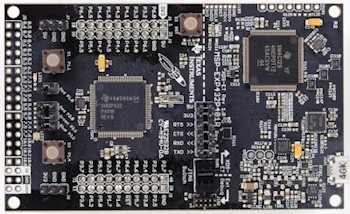
Hey folks, how are you today? we will be talking about the Texas instruments MSP432 development board. Energia IDE is used, which can be downloaded here.
The code is seen below and also in my Github.
/*
Created by Clovis Fritzen (clovisf AT gmail .com), from the "Button" example sketch on the Energia IDE.
This sketch controls the Texas Instruments MSP432 (ARM Cortex-M4) microcontroller,
at the MSP-EX432P401R launchpad.

- No buttons pressed, RGB led is OFF.
- Pressing S1 lights up RGB RED.
- Pressing S2 lights up RGB GREEN.
- Pressing both S1 & S2 lights up RGB BLUE.
*/

// constants won't change. They're used here to
// set pin numbers:
const int buttonPin1 = PUSH1;     // the number of the pushbutton pin
const int buttonPin2 = PUSH2;     // the number of the pushbutton pin
const int ledPin =  RED_LED;      // the number of the LED pin
const int ledPin2 =  GREEN_LED;      // the number of the LED pin
const int ledPin3 =  BLUE_LED;      // the number of the LED pin

// variables will change:
int buttonState1 = 0;         // variable for reading the pushbutton status
int buttonState2 = 0;         // variable for reading the pushbutton status

void setup() {
  // initialize the LED pin as an output:
  pinMode(ledPin, OUTPUT);
  pinMode(ledPin2, OUTPUT);
  pinMode(ledPin3, OUTPUT);
  // initialize the pushbutton pin as an input:
  pinMode(buttonPin1, INPUT_PULLUP);
  pinMode(buttonPin2, INPUT_PULLUP);

}

void loop(){
  // read the state of the pushbutton value:
  buttonState1 = digitalRead(buttonPin1);
  buttonState2 = digitalRead(buttonPin2);

  // check if the pushbutton is pressed.
  // if it is, the buttonState is HIGH:
  if (buttonState1 == HIGH && buttonState2 == HIGH) {
    // turn LED off:
    digitalWrite(ledPin, LOW);
    digitalWrite(ledPin2, LOW);
    digitalWrite(ledPin3, LOW);

  }
    else if  (buttonState1 == LOW && buttonState2 == HIGH)
    {
          digitalWrite(ledPin, HIGH);
          digitalWrite(ledPin2, LOW);
          digitalWrite(ledPin3, LOW);
    }
           else if (buttonState1 == HIGH && buttonState2 == LOW)
           {
            digitalWrite(ledPin, LOW);
            digitalWrite(ledPin2, HIGH);
            digitalWrite(ledPin3, LOW);

            } else if (buttonState1 == LOW && buttonState2 == LOW) {
              digitalWrite(ledPin, LOW);
              digitalWrite(ledPin2, LOW);
              digitalWrite(ledPin3, HIGH);
            }

}
There is a video of the sketch above running in the board:
You noticed we did not use any delay() function in the code; if you ever need, I wrote a function for Arduino that substitutes the use of delay(), here.


Pingback: What are the Arduino alternatives? - FritzenLab electronics