We are going to implement a LED display clock and thermometer with DS1307 and TM1637. It will show the temperature and time alternatively in a 4-digit 7-segment display controlled by Arduino.
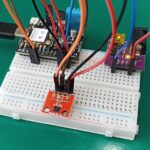
We have talked about the real time clock (RTC) controller IC DS1307 here. It is capable of keeping hour, minute, second, day, month and year (including leap) even when there is no power. This is due to featuring a CR2032 battery onboard. It communicates with Arduino via i2c.
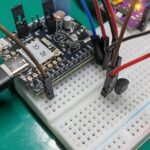
The TM1637 is a chip capable of controlling up to four digits 7-segment displays using only two digital pins of Arduino. Then the temperature will be read via a NTC thermistor, which we have seen here.
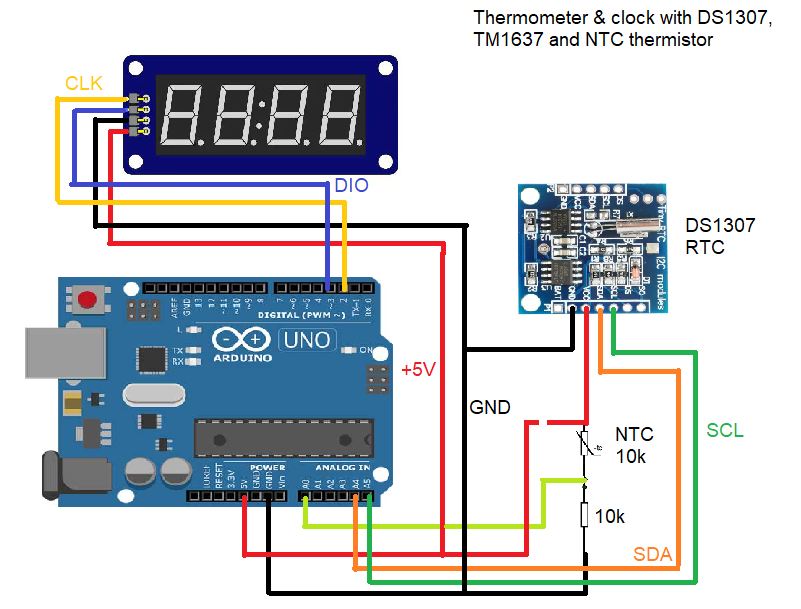
Schematic diagram is seen below. Notice that the TM1637 LED driver uses only pins 2 and 3 (could be any pin really), the DS1307 used i2c (pins A4 and A5 of Arduino) and the NTC uses analog pin A0.
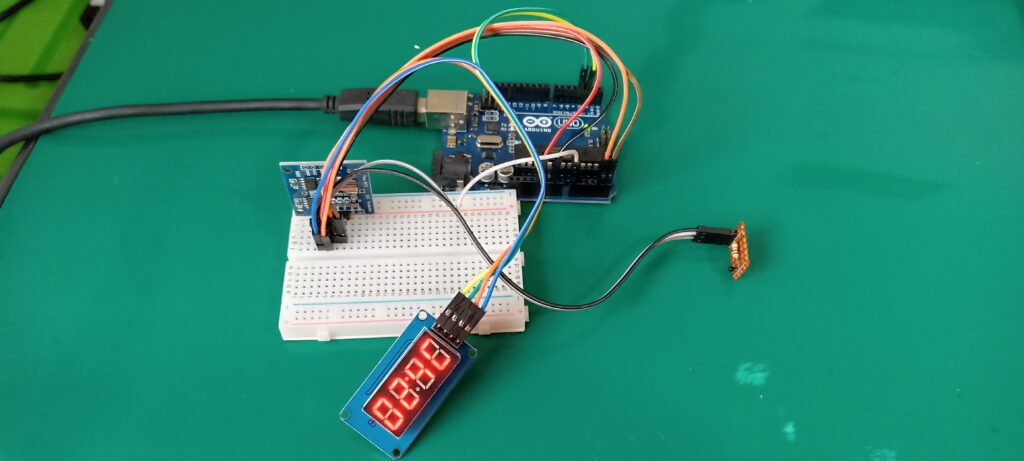
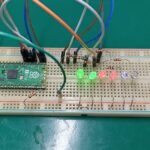
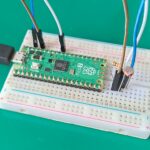
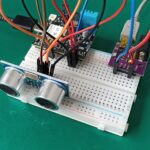
Assembling the circuit on the bench resulted in the picture below, notice I have assemble the NTC and its series resistor on a small perfboard.
The code
The code can be copied from below. Notice that you have to (only once) set the RTC clock, see the link above (the full article about it) to see how to do it. I have had to come up with my own way of tackling a problem: I was not able to find a way to show both an int (the temperature) and a char (the letter “c”).
#include <Arduino.h>
#include <TM1637Display.h>
//Load RTC DS1307's library
#include <DS1307.h>

// Module connection pins (Digital Pins)
#define CLK 2
#define DIO 3

//Random comment

//i2c ports in Arduino UNO
DS1307 rtc(A4, A5);


char* hour;
char* minute;
int hourint;
int minuteint;
int hourminute;

const uint8_t cletter[] = {
	SEG_A | SEG_D | SEG_E | SEG_F            //Letter 'C'
	};

TM1637Display display(CLK, DIO);

// Thermistor pin
const int pinThermistor = A0;

// thermistor parameters
const double beta = 3950.0;
const double r0 = 10000.0;
const double t0 = 273.0 + 25.0;
const double rx = r0 * exp(-beta/t0);

// circuit parameters
const double vcc = 4.92;
const double R = 9810.0;

// Number of samples
const int nsamples = 5;

long currenttime;
long oldtime= 0;
int sweepcounter;

void setup() {
  // put your setup code here, to run once:
  rtc.halt(false);
  //Serial.begin(9600);
  display.clear();
  Serial.begin(9600);
}

void loop() {

currenttime= micros();
if(currenttime - oldtime >= 100000){
  oldtime= micros();
  sweepcounter++;
  if(sweepcounter == 1){
    hour = strtok(rtc.getTimeStr(), ":");
    //Serial.print("hour= ");
    //Serial.println(hour);
    minute= strtok(NULL, ":");
    //Serial.print("minute= ");
    //Serial.println(minute);
    hourint= atoi(hour)*100; //to integer conversion
    minuteint= atoi(minute);
    hourminute= hourint + minuteint;
    display.setBrightness(0x0f);
    if(sweepcounter == 1){
      display.clear();
    }
    display.showNumberDecEx(hourminute, 0x40, false);
    // how to show the dots in the middle: https://forum.arduino.cc/t/how-to-show-the-two-dots-on-4-digit-7-segments-display/592130/2
    Serial.println("passou no 1");
  }else if(sweepcounter == 50){
    // Read the sensor a couple of times
    int sum = 0;
    for (int i = 0; i < nsamples; i++) {
      sum += analogRead(pinThermistor);
    delay (5);
    }

    // Thermistor resistance
    double v = (vcc*sum)/(nsamples*1024.0);
    double rt = (vcc*R)/v - R;

    // Temperature calculations (celsius)
    double t = beta / log(rt/rx);
    int tempcelsius= t-273.0;

    display.showNumberDecEx(tempcelsius, false, 1, 3);
    display.setSegments(cletter, 1, 3); //Letter 'C'
    Serial.println("passou no 50");
  }else if(sweepcounter == 70){
    sweepcounter= 0;
    Serial.println("passou no 70");
  }else{

  }


  }


}
What I did was to first show the temperature (an int) and immediately after show the letter “c”:
display.showNumberDecEx(tempcelsius, false, 1, 3);
display.setSegments(cletter, 1, 3); //Letter 'C'
This way things occur one after another and gives the user the impression of being happening at the same time. Another thing worthy of note is the NTC thermistor reading: it used equations from my former post here.
The end result
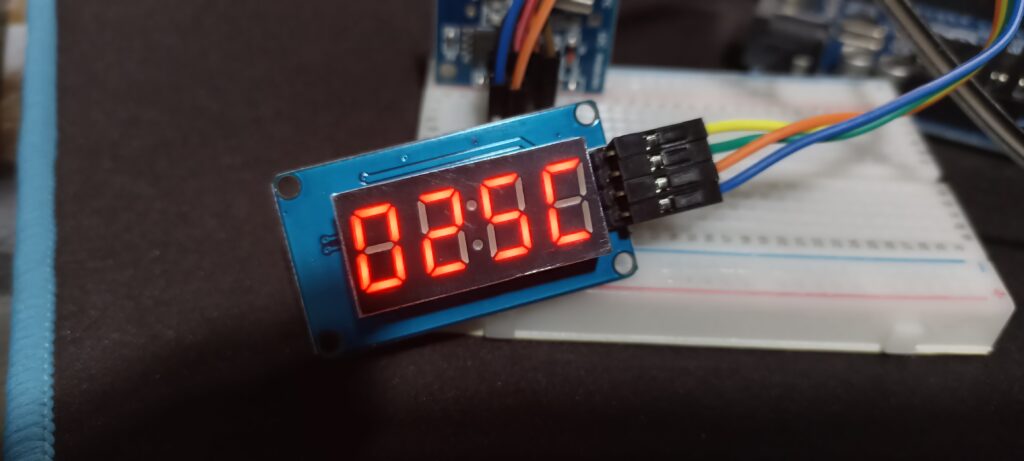
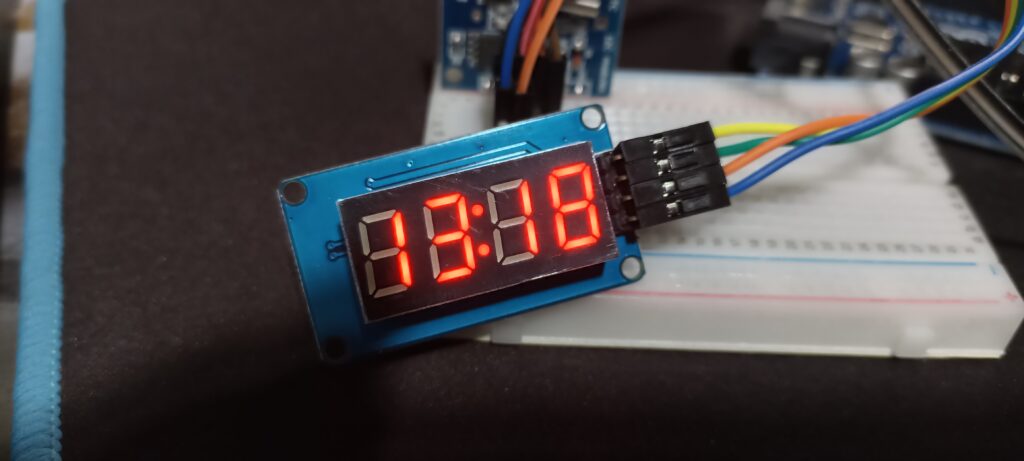
The end result is in the pictures and video below, the time is shown for 5 seconds and then the temperature shows up for 2 seconds.
Final words
These days implementing a digital clock in not difficult at all. Arduino has a bunch of different way and controllers and displays to accomplish it.
Do you want to replicate this clock at home? get the TM1637 LED controller, DS1307 RTC and NTC thermistor from my affiliate Aliexpress links.

Leave a Reply