Today we are going to talk about the BMP280 temperature sensor with ESP32-S2 Franzininho. BMP280 is an atmospheric pressure and temperature sensor based on MEMS silicon membrane technology, manufactured by Bosch.
Its temperature sensor measures between -40ºC and +85ºC, while the pressure sensor measures between 300hPa and 1100hPa. One hPa is equal to 100 Pascals (10.19 Kgf/m2). The average atmospheric pressure at sea level is 1013hPa.
This sensor communicates with microcontrollers through i2c or SPI, in this article we will see an example with i2c communication. We will follow a lot of information from this tutorial.
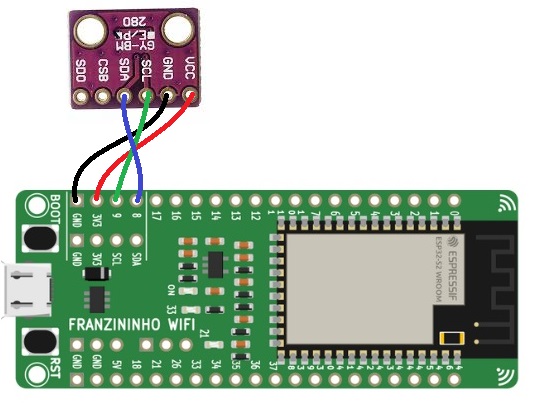
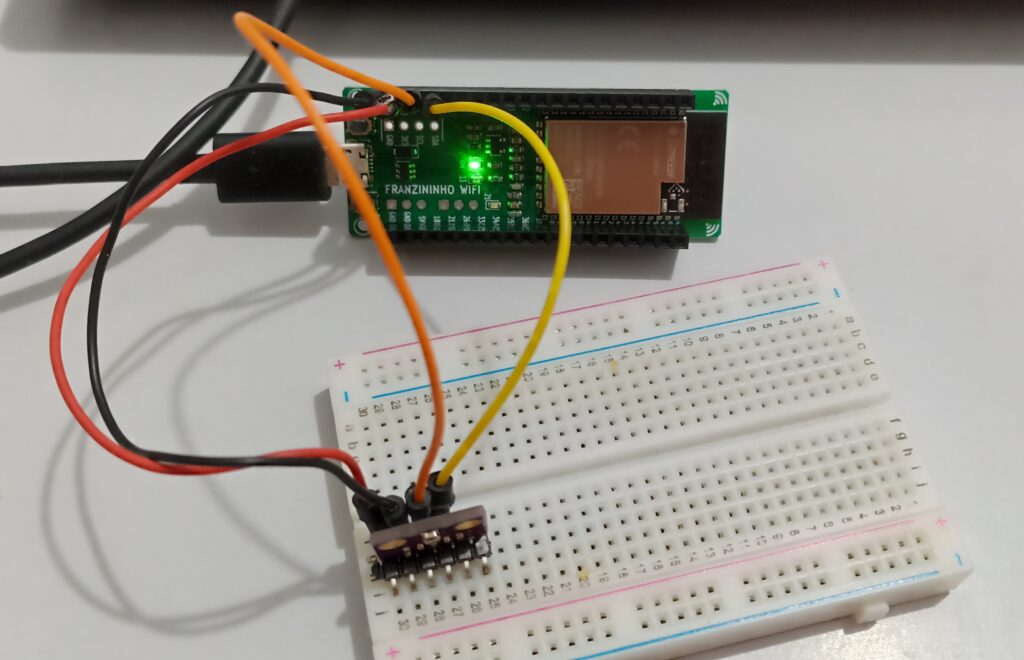
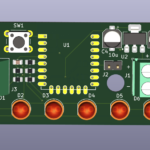
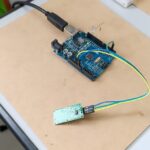
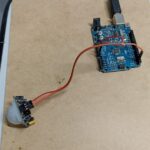
Following the pinout of Franzininho WiFi and the BMP280 sensor, we obtain at the connections below. The entire circuit works with 3.3V in addition to just the two i2c pins and GND.
In order for us to program the example via the Arduino IDE, it is only necessary to install a library. In the Arduino IDE, go to “Draft > Include library > Manage libraries” and type “BMP280”. The correct library to install is Adafruit’s.
The code
The sketch/code used was bmp280test which comes with the library we installed above. To access it, go to “File > Examples > Adafruit BMP280 Library” and open ‘”BME280test”.
#include <Wire.h>
#include <SPI.h>
#include <Adafruit_BMP280.h>

#define BMP_SCK  (13)
#define BMP_MISO (12)
#define BMP_MOSI (11)
#define BMP_CS   (10)

Adafruit_BMP280 bmp; // I2C
//Adafruit_BMP280 bmp(BMP_CS); // hardware SPI
//Adafruit_BMP280 bmp(BMP_CS, BMP_MOSI, BMP_MISO,  BMP_SCK);

void setup() {
  Serial.begin(9600);
  while ( !Serial ) delay(100);   // wait for native usb
  Serial.println(F("BMP280 test"));
  unsigned status;
  status = bmp.begin(BMP280_ADDRESS_ALT, BMP280_CHIPID);
  //status = bmp.begin();
  if (!status) {
    Serial.println(F("Could not find a valid BMP280 sensor, check wiring or "
                      "try a different address!"));
    Serial.print("SensorID was: 0x"); Serial.println(bmp.sensorID(),16);
    Serial.print("        ID of 0xFF probably means a bad address, a BMP 180 or BMP 085\n");
    Serial.print("   ID of 0x56-0x58 represents a BMP 280,\n");
    Serial.print("        ID of 0x60 represents a BME 280.\n");
    Serial.print("        ID of 0x61 represents a BME 680.\n");
    while (1) delay(10);
  }

  /* Default settings from datasheet. */
  bmp.setSampling(Adafruit_BMP280::MODE_NORMAL,     /* Operating Mode. */
                  Adafruit_BMP280::SAMPLING_X2,     /* Temp. oversampling */
                  Adafruit_BMP280::SAMPLING_X16,    /* Pressure oversampling */
                  Adafruit_BMP280::FILTER_X16,      /* Filtering. */
                  Adafruit_BMP280::STANDBY_MS_500); /* Standby time. */
}

void loop() {
    Serial.print(F("Temperature = "));
    Serial.print(bmp.readTemperature());
    Serial.println(" *C");

    Serial.print(F("Pressure = "));
    Serial.print(bmp.readPressure());
    Serial.println(" Pa");

    Serial.print(F("Approx altitude = "));
    Serial.print(bmp.readAltitude(1020)); /* Adjusted to local forecast! */
    Serial.println(" m");

    Serial.println();
    delay(2000);
}
See that in the code above we enable i2c and disable SPI:
Adafruit_BMP280 bmp; // I2C
//Adafruit_BMP280 bmp(BMP_CS); // hardware SPI
//Adafruit_BMP280 bmp(BMP_CS, BMP_MOSI, BMP_MISO,  BMP_SCK);
When compiling and downloading the Arduino IDE code for Franzininho WiFi, I had to use an i2c scanner code. This is because my device was at address 0x76, it end up not connect to the sketch. I had to change part of the code to be the same as the two lines below:
status = bmp.begin(BMP280_ADDRESS_ALT, BMP280_CHIPID);
//status = bmp.begin();
Originally/previously it was:
//status = bmp.begin(BMP280_ADDRESS_ALT, BMP280_CHIPID);
status = bmp.begin();
This is because this link says that 0x76 is an alternative address. After that, download the code “BME280test” as mentioned above, and observe the serial monitor. It is at the bottom of the screen (in IDEs version 2.0 or higher) or in “Tools > Serial Monitor” in older IDEs.
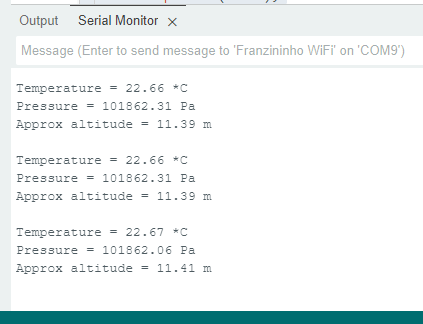
In the image above everything is correct, but the first time I turned on the circuit the altitude was negative. This is because according to this Adafruit document you need to know the pressure at sea level closest to your location, and in real time. It translates into having a more accurate altitude reading.
It was in the line below that I made the change, I inserted 1020 which was the approximate pressure at sea level near my city at the time of writing the article. To find out this pressure and enter it in the line below, go to Google and type “atmospheric pressure in NAMEOFTHECITY”. Remembering that the city has to be coastal (or at sea level) as close to your city as possible.
Serial.print(bmp.readAltitude(1020)); /* Adjusted to local forecast! */Final thoughts
Other than that, atmospheric pressure is shown in Pa (Pascals) and temperature in degrees Celsius. For now that’s all I have to go through. If you want to learn about another temperature sensor, see my article about the SHT21.
Want to buy a BMP280? use my link here.


Leave a Reply